Pengguna biasanya mengalami masalah ini setelah mencoba memperbarui Windows 10 melalui Pembaruan Windows (WU). Kesalahan 0x8024a105menandakan masalah dengan komponen Pembaruan Otomatis .Biasanya, setelah pembaruan yang gagal, pengguna akan melihat pesan berikut:
“Ada masalah saat mengunduh beberapa pembaruan, tetapi kami akan mencoba lagi nanti. Jika Anda terus melihat ini, coba telusuri web atau hubungi dukungan untuk mendapatkan bantuan. Kode kesalahan ini mungkin membantu: (0x8024a105). ”

Jika saat ini Anda berjuang dengan masalah ini, kami telah berhasil mengidentifikasi beberapa perbaikan yang layak yang telah berhasil membantu pengguna dalam situasi yang sama seperti Anda. Harap ikuti setiap metode di bawah ini hingga Anda menemukan solusi yang berhasil menyelesaikan masalah Anda.
Metode 1: Menjalankan pemecah masalah Pembaruan Windows
Mari kita mulai dengan sederhana, dengan menjalankan pemecah masalah Pembaruan Windows . Beberapa pengguna telah berhasil mengizinkan pembaruan untuk diselesaikan dengan mengizinkan pemecah masalah internal untuk secara otomatis memperbaiki komponen yang rusak. Berikut panduan singkat tentang cara menjalankan Pemecah Masalah Pembaruan Windows :
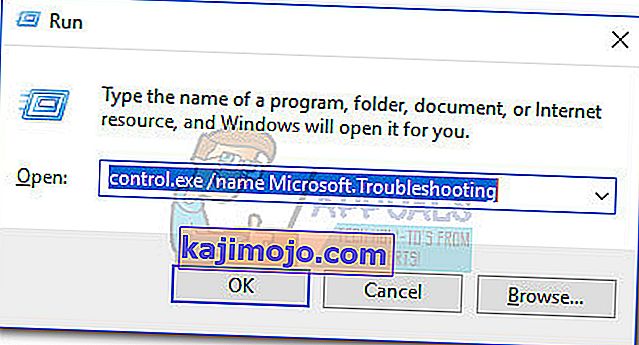
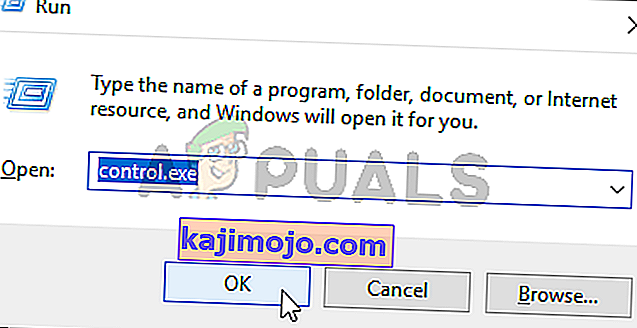
- Tekan tombol Windows + R untuk membuka jendela Jalankan. Ketik atau tempel yang berikut ini.
control.exe / nama Microsoft. Penyelesaian masalah
Tekan Enter untuk membuka pemecah masalah bawaan.
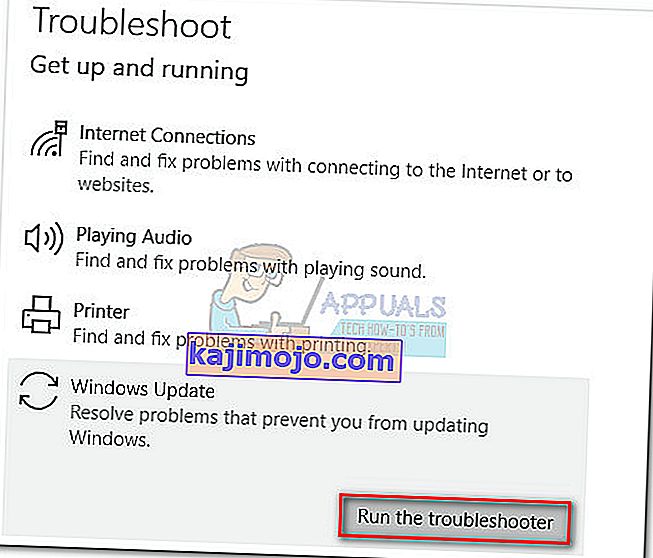
- Di jendela Pemecahan masalah , klik Pembaruan Windows , lalu klik Jalankan pemecah masalah .
- Tunggu hingga pemecah masalah mendeteksi masalah dengan klien pembaruan Anda. Jika berhasil mengidentifikasi masalah apa pun dengannya, ikuti petunjuk di layar untuk memicu perbaikan otomatis. Biasanya, Anda hanya perlu memilih Terapkan perbaikan ini .
- Jika Pemecah Masalah Pembaruan melaporkan bahwa ia berhasil memperbaiki apa pun, mulai ulang komputer Anda dan lihat apakah masalah telah teratasi pada permulaan berikutnya.


Jika pembaruan masih gagal dengan kesalahan 0x8024a105 , pindah ke Metode 2.
Metode 2: Ubah Pengaturan Kontrol Akun Pengguna (UAC)
Jika pemecah masalah tidak berhasil memperbaiki masalah secara otomatis, mari kita lihat apakah masalah tersebut tidak dibuat oleh pengaturan Kontrol Akun Pengguna . Ternyata, beberapa pembaruan gagal dengan kesalahan 0x8024a105 karena akun yang masuk tidak memiliki izin yang diperlukan. Anda dapat memperbaiki masalah ini dengan mudah dengan mengubah izin Akun Pengguna yang terkait dengan akun Anda ke Administrator. Berikut panduan cepat untuk melakukan ini:
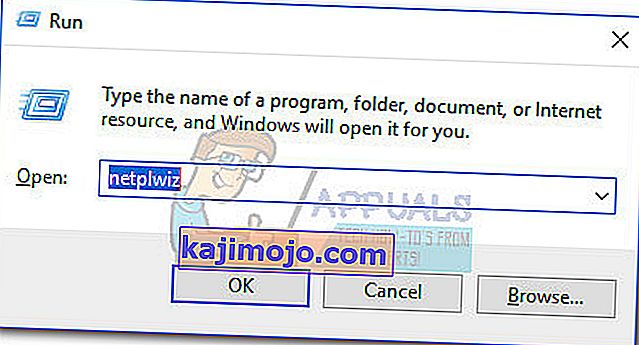
- Tekan tombol Windows + R untuk membuka jendela Jalankan. Ketik atau tempel " netplwiz " dan tekan Enter untuk membuka pemecah masalah internal.
- Di tab Pengguna , pilih pengguna yang Anda gunakan dan klik Properti.
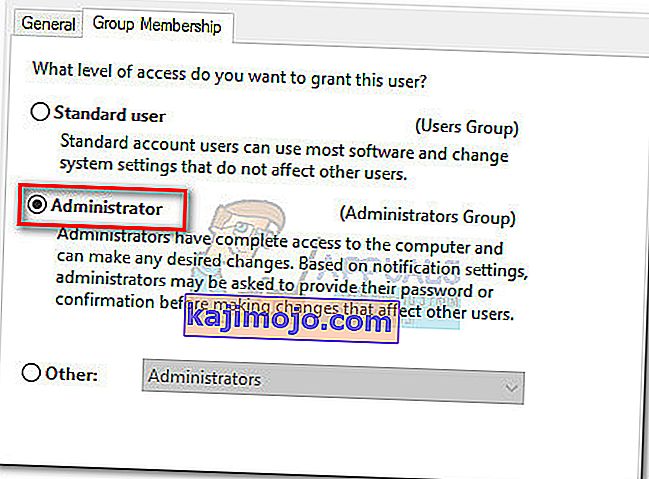
- Di jendela Properties , buka Keanggotaan Grup dan setel tingkat akses ke Administrator . Tekan Terapkan untuk menyimpan perubahan Anda.
 Catatan: Jika tingkat akses sudah diatur ke Administrator , pindah langsung ke Metode 3 .
 - Nyalakan ulang komputer Anda dan pastikan Anda masuk dengan akun pengguna yang sama. Setelah startup selesai, coba lakukan pembaruan lagi. Jika Anda melihatnya gagal dengan kesalahan 0x8024a105 , pindah ke metode ketiga.

 Catatan: Jika tingkat akses sudah diatur ke Administrator , pindah langsung ke Metode 3 .
Metode 3: Mengatur ulang komponen Pembaruan Windows secara manual
Jika metode di atas terbukti tidak berhasil, kami tidak punya banyak pilihan selain mengatur ulang Komponen Pembaruan Windows secara manual dan kemudian memulai ulang proses Pembaruan Windows . Dari empat metode unggulan, yang satu ini memiliki kemungkinan sukses yang lebih tinggi tetapi membutuhkan lebih banyak penyesuaian.
Berikut panduan cepat untuk mengatur ulang komponen Pembaruan Windows:
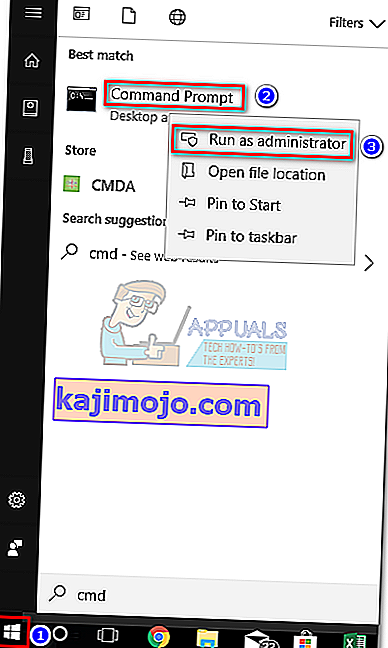
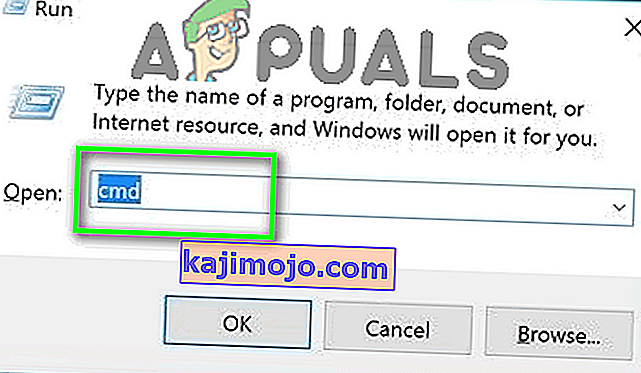
- Klik bilah Windows Start (pojok kiri bawah) dan cari “ cmd “. Kemudian, klik kanan pada Command prompt dan pilih Run as Administrator .
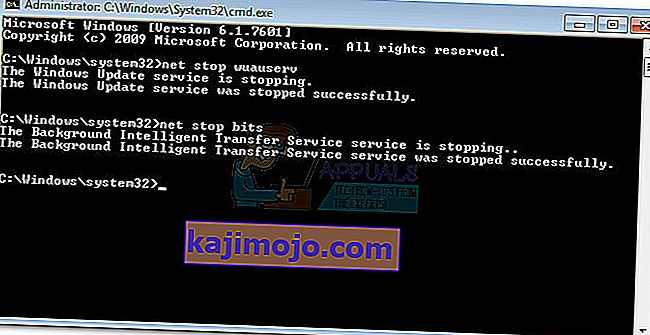
- Di Command Prompt yang ditinggikan, kami akan menghentikan layanan Penginstal MSI, Pembaruan Windows, BITS, dan Kriptografi . Untuk melakukan ini, masukkan perintah berikut dan tekan Enter setelah masing-masing:
net stop wuauserv net stop cryptSvc net stop bits net stop msiserver
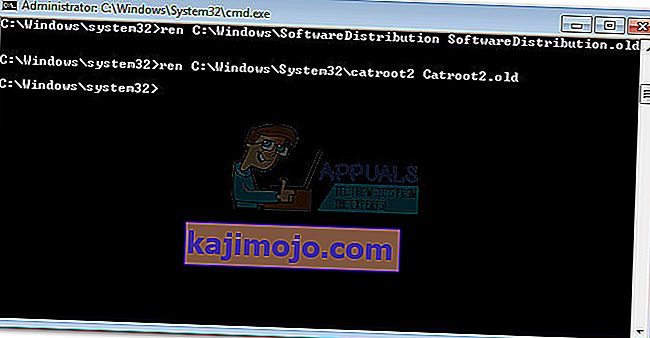
- Setelah semua layanan dihentikan, mari ganti nama folder SoftwareDistribution dan folder Catroot2 untuk memaksa Pembaruan Windows untuk memulai kembali komponennya. Tempel atau ketik dua perintah ke Command prompt yang ditinggikan dan tekan Enter setelah masing-masing:
ren C: \ Windows \ SoftwareDistribution SoftwareDistribution.old
ren C: \ Windows \ System32 \ catroot2 Catroot2.old
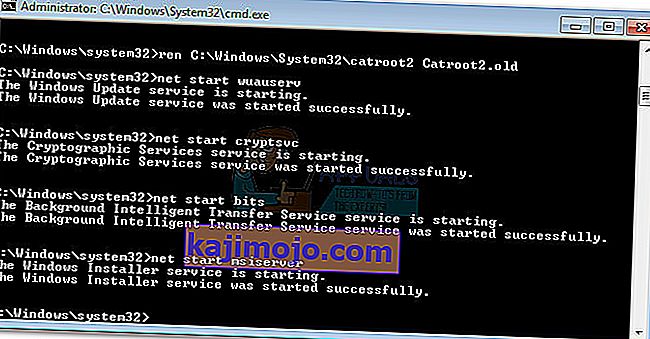
- Setelah dua folder diganti namanya, saatnya untuk memulai ulang layanan Penginstal MSI, BITS, Kriptografi, dan Pembaruan Windows. Untuk melakukan ini, ketik perintah berikut di Command Prompt dan tekan Enter setelah setiap perintah:
mulai bersih wuauserv mulai bersih cryptSvc bit mulai bersih msiserver bersih
- Setelah layanan dimulai ulang, tutup Command Prompt yang ditinggikan dan reboot komputer Anda.


Metode 4: Hapus Folder Distribusi Perangkat Lunak
Dalam beberapa kasus, masalah dapat diperbaiki hanya dengan menghapus folder menggunakan Powershell. Oleh karena itu, pada langkah ini, pertama, kita akan menjalankan PowerShell sebagai admin dan kemudian kita akan menghapus folder distribusi Perangkat Lunak untuk memulai proses pembaruan. Untuk itu:
- Tekan tombol "Windows" + "X" secara bersamaan dan pilih opsi "Power Shell (Admin)" .
- Ketik perintah berikut dan tekan "Enter" untuk menjalankannya.
berhenti bersih wuauserv
- Sekali lagi, ketik perintah berikut dan tekan "Enter".
bit penghenti bersih
- Terakhir, navigasikan ke folder berikut.
C: \ Windows \ SoftwareDistribution
- Tekan “Ctrl” + “A” untuk memilih semua konten folder dan tekan tombol “Shift” + “Del” untuk menghapusnya secara permanen.

- Konfirmasikan semua petunjuk yang memperingatkan Anda tentang menghapus file-file ini dan kemudian reboot komputer Anda untuk menyelesaikan proses.
- Sekarang, coba perbarui dan periksa untuk melihat apakah masalah tetap ada.

Setelah komputer Anda boot kembali, lihat apakah Anda dapat menginstal pembaruan tanpa kesalahan 0x8024a105 . Jika Anda melakukannya, coba lakukan pemindaian SFC untuk memperbaiki masalah apa pun dengan file atau driver yang hilang.
Metode 5: Perbarui Menggunakan Alat Pembuatan Media
Dalam beberapa kasus, Anda mungkin tidak dapat memperbarui komputer Anda menggunakan proses Pembaruan Windows default karena Windows Anda mungkin tidak dapat membuat koneksi yang tepat dengan server Pembaruan. Oleh karena itu, pada langkah ini, kami akan menyebarkan Alat Pembuatan Media Windows untuk melakukan pembaruan bagi kami. Ini akan secara otomatis mengunduh dan menginstal file pembaruan untuk meningkatkan Windows kita. Untuk itu:
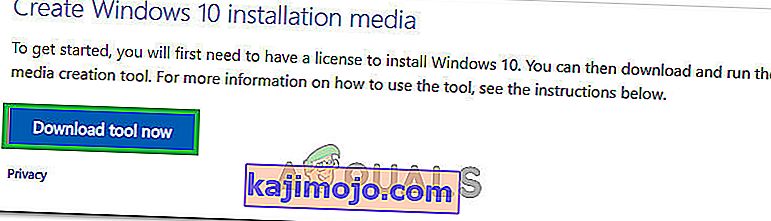
- Unduh Alat Pembuatan Media Windows dari sini.
- Run the executable and follow with the on-screen instructions for the initial setup.
- After the initial setup, select the “Upgrade this PC” option and click on “Next”.
- Accept the License terms and let the installer run.
- The tool will now automatically grab the update files from the servers and update your computer to the latest version available.
- Check to see if doing so has fixed the error.

Method 6: Delete Download Folders
When a new update is downloaded, it is generally stored in some folders on the computer. In this step, we will be deleting some of these folders and which will prompt the operating system to go ahead and download new files which can sometimes clear out the error and the update will be applied normally. For that:
- Press “Windows” + “R” to open the Run prompt.
- Type in “Control Panel” and press “Enter” to launch the classical control panel interface.
- In the Control Panel, click on the “View By:” option and select “Large Icons” from the list.
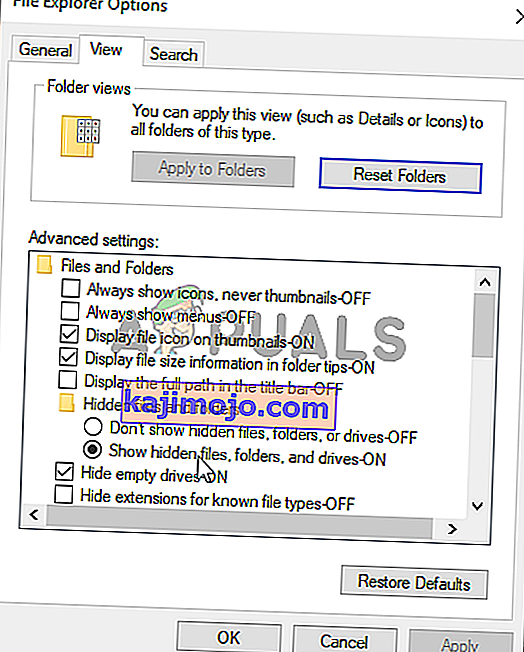
- Click on the “File Explorer Options” and a new window should pop up.
- In the File Explorer Options, click on the “View” button and then double click on the “Files and Folders” button to expand it.
- After that, double click on the ‘Hidden Files and Folders” to expand it as well.
- Check the “Show hidden Files, Folders and Drives” option and click on “Apply” to save your changes.
- Click on “OK” to close out of the window and press “Windows’ + “E” to launch the file explorer.
- In the File Explorer, delete the “$Windows.~WS” and “$Windows. ~BT” folders.
- Make sure to clear out the recycle bin as well so that they cannot be recovered.
- After this, press “Windows’ + “I” to launch settings and click on the “Update and Security” option.

- In Update and Security, click on the “Windows Update” option on the left pane and then click on the “Check for Updates” button.
- Updates will now automatically be downloaded and installed.
- Check to see if the issue persists.


Method 7: Resetting Catroot2 Folder
In some cases, it is possible that the Catroot2 folder and its files have either been corrupted or they have been misconfigured due to which this issue is being triggered. Therefore, in this step, we will first be making some changes from the command prompt and then we will delete the files inside that folder. For that:
- Press “Windows’ + “R” to launch the run prompt.
- Type in “cmd” and then press “Shift” + “Ctrl” + “Enter” to provide administrative privileges.
- Type in the following command and press “Enter” to execute it.
net stop cryptsvc
- After you have stopped the cryptsvc using the command above, type in the following commands into the command prompt one by one and press “Enter” after each to execute them on your computer.
md %systemroot%system32catroot2.old xcopy %systemroot%system32catroot2 %systemroot%system32catroot2.old /s
- After executing the commands stated above, we will be deleting all the files from the catroot folder without deleting the folder itself.
- Press “Windows’ + “R” to open the Run prompt and type in the following address to navigate to the catroot folder.
C:/Windows/System32/catroot2
- Press “Ctrl” + “A” once inside the folder to select all items inside it and press “Shift” + “Delete” to remove them from your computer.
- After removing these, confirm any prompts that might spring up on your screen.
- After that, open the command prompt back up and execute the following command.
net start cryptsvc
- Try to update your computer and check to see if the issue still persists.


Method 8: Configuring Services to Start Automatically
Sometimes, your computer might be preventing certain services from starting and functioning in the background due to which the update might not be properly installed or configured to be applied on your computer. Therefore, in this step, we will be setting up some services to startup automatically. For that:
- Press “Windows’ + “R” to launch the Run prompt.
- Type in “cmd” and press “Ctrl” + “Shift” + “Enter” to provide admin permissions.

- Type in the following commands one by one in the command prompt and press “Enter” after each to execute them.
SC Config wuauserv start=auto SC Config bits start=auto SC Config cryptsvc start=auto SC Config trustedinstaller start=auto
- This way, we will have configured these services to startup and run automatically in the background.
- Check to see if the issue persists.

Method 9: Re-register Windows Update and BITS Files
It is possible that some windows update files and Bits files might not be properly registered on your computer. Therefore, in this step, we will be re-registering these files on the computer and then we will check to see if that fixes our issue. For that:
- Press “Windows’ + “R’ to open the Run prompt.
- Type in “cmd” and then press the “Ctrl” + “Shift” + “Enter” buttons to provide admin permissions.

Type in the following commands one by one and press “Enter” after each to register the components.regsvr32.exe atl.dll regsvr32.exe urlmon.dll regsvr32.exe mshtml.dll regsvr32.exe shdocvw.dll regsvr32.exe browseui.dll regsvr32.exe jscript.dll regsvr32.exe vbscript.dll regsvr32.exe scrrun.dll regsvr32.exe msxml.dll regsvr32.exe msxml3.dll regsvr32.exe msxml6.dll regsvr32.exe actxprxy.dll regsvr32.exe softpub.dll regsvr32.exe wintrust.dll regsvr32.exe dssenh.dll regsvr32.exe rsaenh.dll regsvr32.exe gpkcsp.dll regsvr32.exe sccbase.dll regsvr32.exe slbcsp.dll regsvr32.exe cryptdlg.dll regsvr32.exe oleaut32.dll regsvr32.exe ole32.dll regsvr32.exe shell32.dll regsvr32.exe initpki.dll regsvr32.exe wuapi.dll regsvr32.exe wuaueng.dll regsvr32.exe wuaueng1.dll regsvr32.exe wucltui.dll regsvr32.exe wups.dll regsvr32.exe wups2.dll regsvr32.exe wuweb.dll regsvr32.exe qmgr.dll regsvr32.exe qmgrprxy.dll regsvr32.exe wucltux.dll regsvr32.exe muweb.dll regsvr32.exe wuwebv.dll
- After executing the commands listed above, check to see if the issue still persists.

Note: After trying the following fixes, if the issue still persists, try to perform a clean boot and check if that fixes it. If it does, update in the clean boot and then get out of it after the update is completed. If that doesn’t work, try to go for a clean install of Windows.