Jika komputer Anda memiliki perangkat audio Conexant dan Anda memutakhirkannya ke Windows 10, ada sedikit kemungkinan bahwa komputer tidak lagi dapat memutar audio setelah peningkatan. Masalah ini telah diketahui mengganggu persentase yang baik dari semua pengguna dengan perangkat audio Conexant yang memutakhirkan komputer mereka ke Windows 10. Penyebab masalah ini, di hampir semua kasus, adalah bahwa driver audio Conexant di komputer yang terpengaruh tidak kompatibel dengan Windows 10, dan Windows tidak dapat memutakhirkan driver selama pemutakhiran Windows 10.
Masalah ini dapat diperbaiki hanya dengan memperbarui driver audio Conexant di komputer yang terpengaruh, tetapi karena itu tidak terjadi secara otomatis selama peningkatan Windows 10, Anda harus melakukannya secara manual. Untuk melakukannya, Anda harus mengunduh paket driver untuk perangkat audio Conexant komputer Anda yang tidak hanya lebih baru dari yang sudah diinstal tetapi juga dijamin kompatibel dengan Windows 10. Karena Conexant tidak merilis driver untuk perangkat audio di situs webnya sendiri, Anda harus mengunduh paket driver baru dari situs web Dukungan resmi pabrikan komputer yang terpengaruh (Acer atau HP - misalnya).
Metode 1: Perbarui Driver Secara Manual
Setelah Anda mengunduh dan paket driver baru untuk perangkat audio Conexant komputer yang terpengaruh, Anda perlu menginstalnya. Untuk menginstal paket driver baru, yo
- Tekan tombol Logo Windows + R untuk membuka Jalankan
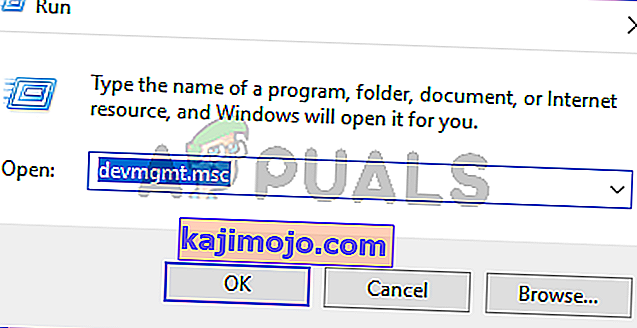
- Ketik devmgmt.msc ke dalam dialog Run dan tekan Enter untuk meluncurkan Device Manager .
- Di Pengelola Perangkat , klik dua kali pada bagian Pengontrol suara, video, dan permainan untuk meluaskannya.
- Klik kanan pada perangkat audio Conexant dan klik Perbarui Perangkat Lunak Pengemudi… di menu konteks.
- Klik Jelajahi komputer saya untuk perangkat lunak driver .
- Klik Browse ….
- Arahkan ke folder tempat paket driver baru berada dan klik pada folder untuk memilihnya.
- Klik OK .
- Klik Berikutnya , dan kemudian tunggu wizard untuk menemukan paket driver baru dan menginstalnya.

Setelah paket driver baru untuk perangkat audio Conexant komputer yang terpengaruh telah diinstal, mulai ulang dan, jika semuanya berjalan dengan baik, suara akan dipulihkan.
Metode 2: Nonaktifkan Peningkatan Audio
Dalam beberapa kasus, jika Anda telah mengaktifkan penyempurnaan suara tertentu, masalah tersebut mungkin terpicu. Oleh karena itu, pada langkah ini, kami akan menonaktifkan semua peningkatan Audio. Untuk itu:
- Klik kanan pada ikon "Speaker" di sisi kiri bawah layar dan pilih opsi "Open Sound Settings" .
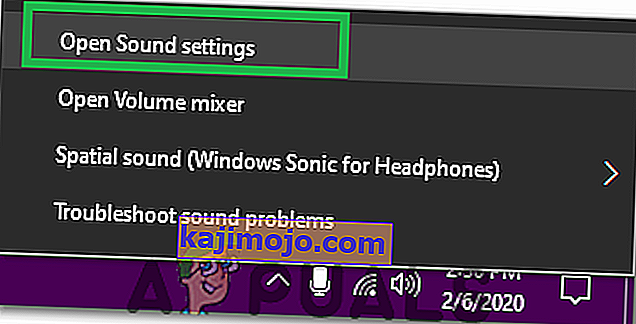
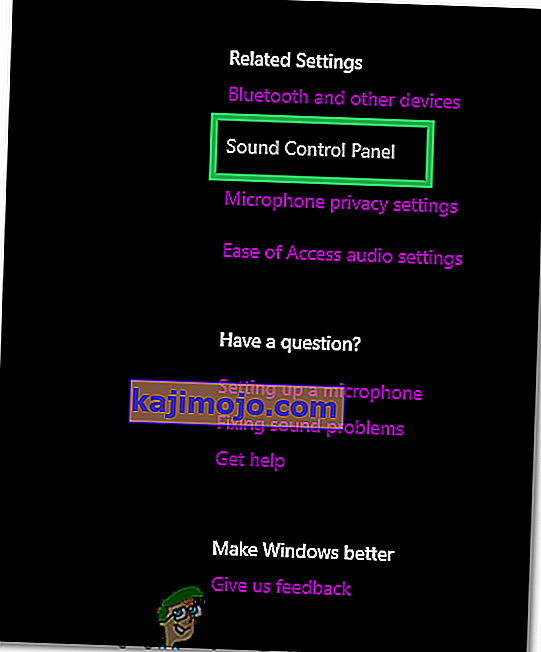
- Di sisi kanan atas, pilih opsi "Open Sound Control Panel" dan klik kanan pada "Speaker" Anda.
- Pilih "Properties" dari daftar dan klik "Enhancements" di tab berikutnya.
- Centang opsi " Disable All Enhancements " dan klik "Apply".

- Pilih "OK" untuk menutup jendela dan periksa untuk melihat apakah masalah tetap ada.


Catatan: Anda juga dapat mencoba mem-boot komputer Anda dengan boot bersih dan memeriksa apakah itu membantu dengan masalah tersebut.
Metode 3: Mengembalikan Pengemudi
In certain cases, the driver might not be properly installed and compatible with the hardware that is being used by the computer due to which this issue is being triggered. Therefore, in this step, we will be rolling back the driver and then check if the issue still persists. For that:
- Press “Windows” + “R” to open the Run prompt.
- Type in “Devmgmt.msc” and press “Enter”.
- Expand the “Sound, Video and Game Controllers” tab and right-click on the sound driver.
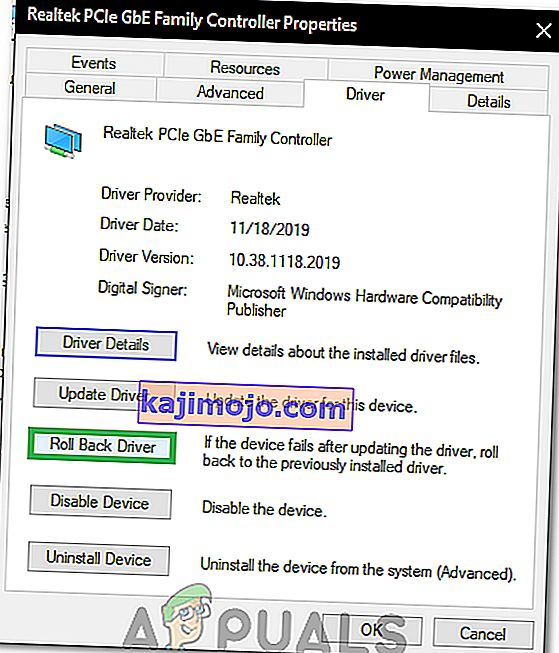
- Select “Properties” from the list and click on the “Driver” tab.
- Click on the “Rollback Driver” option and follow the on-screen prompts to roll the driver back to its previous version.
- After rolling back the driver, check to see if the issue persists.


Method 4: Using High Definition Audio
Third-party drivers are very glitchy on Windows 10 and that can be seen by observing the plethora of user complains on the Microsoft website about driver issues. That might be the thing that is wrong with your computer and you might be using glitchy drivers. Therefore, in this step, we will be using the Default HD High Definition Audio Drivers for your computer. In order to use these:
- Press “Windows” + “R” to open the Run prompt.
- Type in “Devmgmt.msc” and press “Enter”.
- Expand the “Sound, Video and Game Controllers” tab and right-click on the sound driver.
- Select “Properties” from the list and click on the “Driver” tab.
- Click on the “UpdateDriver” option and then select “Browse my computer for Driver Software“.

- After that, on the next screen, click on the “Let me pick from a list” option and select the “High Definition Audio Device” in the next screen.

- Click on “Next” and follow the on-screen prompts to install the driver instead of the third-party one.
- Check to see if the sound works after doing this.
Note: If this doesn’t work, choose the Nvidia High Definition Audio in the 6th step and check again.


Method 5: Changing Memory Settings
In certain cases, your memory settings might be affecting the driver by preventing it from being able to utilize enough RAM to keep the Audio working. Therefore, in this step, we will be changing the memory settings and set it to a specific amount. For that:
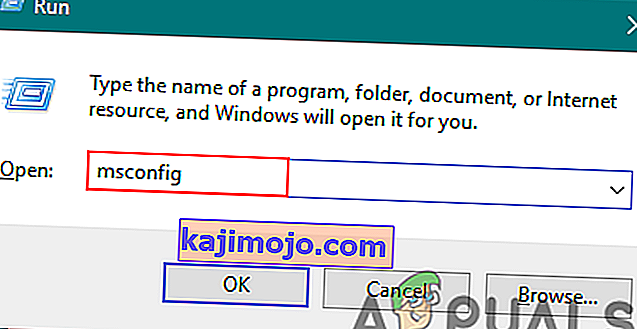
- Press “Windows” + “R to open the Run prompt.
- Type in “msconfig” and press “Enter”.
- Click on the “Boot” tab and then select the “Advanced” button.
- In the advanced options, check the “Maximum Memory” option and type in “3072”.
- Klik "OK" dan kemudian tutup jendela.
- Periksa untuk melihat apakah masalah masih berlanjut.
