TeamViewer adalah program yang berguna untuk obrolan video dan kendali jarak jauh dan merupakan pilihan yang cukup populer di kalangan gamer dan bantuan TI jarak jauh. Namun, banyak pengguna yang melaporkan bahwa mereka tidak dapat terhubung. Mereka melihat pesan kesalahan bermasalah di bagian bawah layar mereka, di samping lampu merah.

Ada beberapa metode yang dapat Anda gunakan untuk menyelesaikan masalah dan kami sarankan Anda memeriksanya di bawah ini. Mereka biasanya cukup mudah dilakukan dan dapat menyelesaikan masalah Anda dalam sekejap!
Apa Penyebab Kesalahan "Tidak Siap Periksa Koneksi Anda" TeamViewer di Windows?
Masalah khusus ini memiliki banyak penyebab yang berbeda dan menunjukkan dengan tepat mungkin penting jika Anda tidak ingin mencoba setiap metode dalam daftar. Ini akan memandu Anda ke solusi lebih cepat dan itulah mengapa kami memutuskan untuk membuat daftar semua kemungkinan penyebab yang ada di bawah!
- Pengaturan yang salah di file 'hosts' - File 'hosts' berisi informasi penting tentang aplikasi yang terhubung ke Internet dan ada kemungkinan entri untuk TeamViewer rusak. Menghapus entri akan menyebabkan Windows membuatnya kembali, jadi cobalah untuk menyelesaikan masalah.
- Masalah antivirus atau firewall - Jika akses TeamViewer ke Internet dicegah oleh firewall atau antivirus yang Anda jalankan, pastikan Anda mencoba membuat pengecualian untuk file utama yang dapat dijalankan.
- Masalah DNS dan Winsock - Alamat DNS dapat diubah dan Winsock dapat diatur ulang. Bagi banyak pengguna, hanya ini yang diperlukan untuk menyelesaikan masalah, jadi pastikan Anda mencobanya!
- Konektivitas IPv6 - TeamViewer kadang-kadang tidak berfungsi pada IPv6 jadi pastikan Anda mempertimbangkan untuk menonaktifkannya demi menyelesaikan masalah ini. Tidak ada ruginya dan mungkin mengembalikan TeamViewer!
- Antarmuka baru TeamViewer - Antarmuka pengguna bukanlah sesuatu yang seharusnya terkait dengan masalah konektivitas tetapi tentu saja terjadi pada beberapa pengguna TeamViewer. Kembali ke antarmuka lama berhasil menyelesaikan masalah bagi mereka.
Solusi 1: Hapus TeamViewer dari File Host
Sangat mungkin bahwa entri TeamViewer di file 'hosts' di komputer Anda telah rusak. Ini mungkin menunjukkan alamat dan data yang benar-benar salah dan kami sarankan Anda menghapus entri tersebut. Setelah Anda membukanya kembali, entri akan dibuat ulang dan mudah-mudahan masalahnya tidak lagi muncul!
- Arahkan ke lokasi C >> Windows >> System32 >> Drivers >> Etc dengan menavigasi ke sana setelah membuka File Explorer. Pertama, klik This PC atau My Computer dari panel sisi kiri untuk mencari dan membuka Local Disk C Anda .
- Jika Anda tidak dapat melihat folder Windows, Anda mungkin perlu mengaktifkan opsi yang memungkinkan Anda melihat file dan folder tersembunyi. Klik tab " Lihat " di menu atas File Explorer dan klik kotak centang " Item Tersembunyi " di Tampilkan / sembunyikan File Explorer akan menampilkan file tersembunyi dan akan mengingat pengaturan ini sampai Anda mengubahnya lagi.

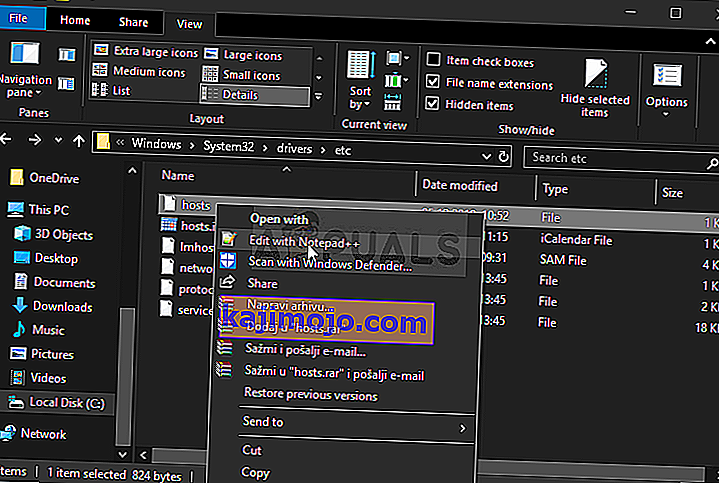
- Temukan file host di folder Etc , klik kanan padanya, dan pilih Buka dengan Notepad . Gunakan kombinasi tombol Ctrl + F dan pastikan Anda memasukkan 'teamviewer' di kotak Temukan apa sebelum mengklik Temukan berikutnya
- Temukan bagian TeamViewer di file. Ini harus dimulai dengan "#Teamviewer" dan pastikan Anda memilih semua miliknya, klik kanan pilihan tersebut, dan pilih tombol Hapus dari menu konteks.
- Klik File >> Simpan untuk menyimpan perubahan atau menggunakan kombinasi tombol Ctrl + S . Keluar dari Notepad dan mulai ulang komputer Anda. Periksa untuk melihat apakah masalah tetap ada terkait TeamViewer "Belum siap. Periksa "pesan kesalahan koneksi Anda!"
Solusi 2: Ubah Alamat DNS Anda
Pengguna mengatakan bahwa mereka dapat menyelesaikan masalah hanya dengan mengubah DNS yang disediakan oleh ISP Anda (Penyedia Layanan Internet) dan mulai menggunakan yang lain. Ini bisa berupa DNS komputer di mana masalah tidak muncul tetapi banyak pengguna hanya menggunakan DNS Google untuk menyelesaikan masalah. Ikuti langkah-langkah di bawah ini untuk mengubah alamat DNS di komputer Anda!
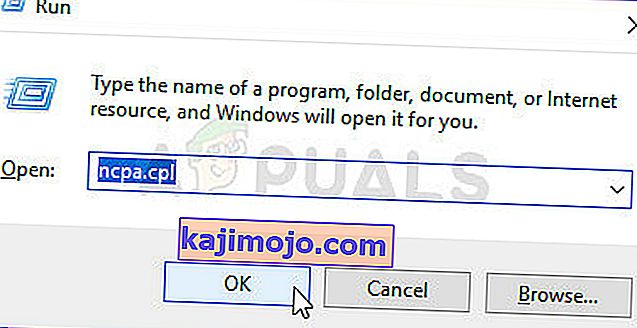
- Gunakan kombinasi tombol Windows + R yang akan membuka kotak Jalankan utilitas tempat Anda harus mengetik ' ncpa.cpl ' di kotak teks dan klik OK untuk membuka entri Pengaturan Koneksi Internet di Panel Kontrol .
- Hal yang sama dapat dilakukan hanya dengan membuka Control Panel secara manual . Alihkan opsi Lihat berdasarkan di bagian kanan atas jendela ke Kategori dan klik Jaringan dan Internet di bagian atas. Klik tombol Jaringan dan Pusat Berbagi untuk membukanya sebelum mengelola untuk menemukan tombol Ubah pengaturan adaptor di menu kiri dan klik di atasnya.
- Sekarang layar Koneksi Internet terbuka menggunakan metode apa pun di atas, klik dua kali adaptor jaringan aktif Anda (yang Anda gunakan untuk menyambung ke Internet) dan klik tombol Properti di bawah jika Anda memiliki izin admin untuk akun pengguna saat ini.
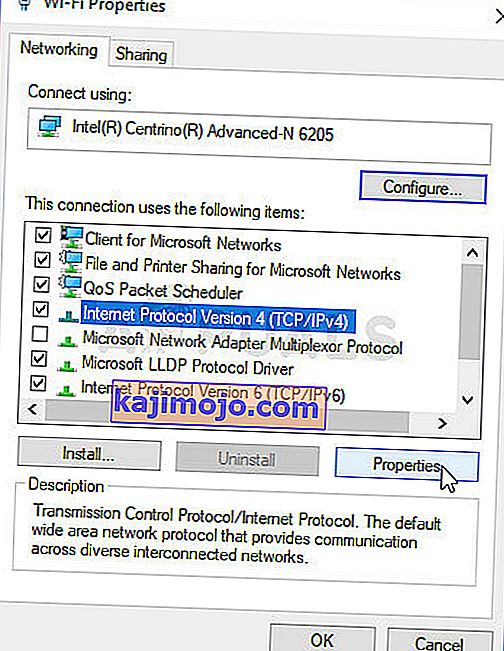
- Temukan item Internet Protocol Version 4 (TCP / IPv4) pada daftar. Klik di atasnya untuk memilihnya dan klik tombol Properties di bawah.
- Tetap di tab Umum dan ubah tombol radio di jendela Properti ke " Gunakan alamat server DNS berikut " jika disetel ke opsi lain.
- Apa pun itu, setel server DNS Pilihan menjadi 8.8.8.8 dan server DNS Alternatif menjadi 8.8.4.4.
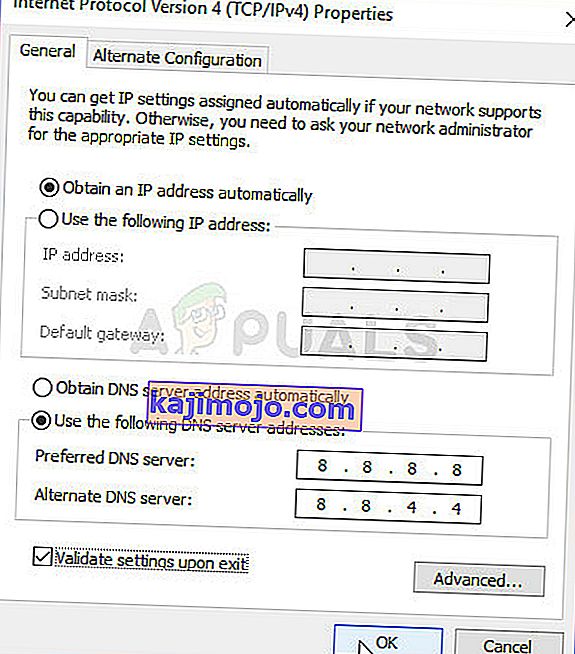
- Biarkan opsi " Validasi setelan setelah keluar " dicentang dan klik OK untuk segera menerapkan perubahan. Periksa untuk melihat apakah TeamViewer "Belum siap. Pesan kesalahan Periksa koneksi Anda ”masih muncul di komputer Anda!


Solusi 3: Setel ulang Winsock
“ Netsh Winsock reset ” adalah perintah berguna yang dapat Anda gunakan di Command Prompt untuk mengatur ulang Katalog Winsock kembali ke pengaturan default atau status bersihnya. Anda dapat mencoba metode ini jika Anda mengalami ketidakmampuan untuk terhubung di TeamViewer.
- Cari " Command Prompt " dengan mengetiknya baik di menu Start atau dengan menekan tombol cari di sebelah kanan. Klik kanan entri pertama yang akan muncul sebagai hasil pencarian dan pilih entri menu konteks " Jalankan sebagai administrator ".
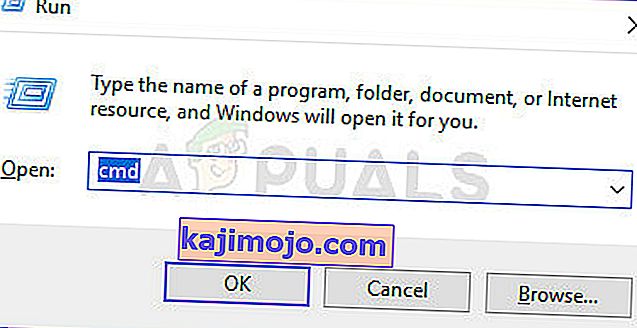
- Selain itu, Anda juga dapat menggunakan kombinasi tombol Windows Logo Key + R untuk membuka kotak dialog Run. Ketik "cmd" di kotak dialog yang muncul dan gunakan kombinasi tombol Ctrl + Shift + Enter untuk menjalankan Command Prompt menggunakan hak administrator.
- Ketik perintah berikut di jendela dan pastikan Anda menekan Enter setelah mengetik masing-masing. Tunggu pesan " Reset Winsock selesai dengan sukses " atau sesuatu yang serupa untuk mengetahui bahwa metode tersebut telah bekerja dan Anda tidak membuat kesalahan saat mengetik. Periksa untuk melihat apakah masalah terus berlanjut.

netsh winsock reset netsh int ip reset

Solusi 4: Jangan Gunakan Antarmuka Pengguna Baru
Antarmuka pengguna seharusnya tidak terhubung dengan cara apa pun ke koneksi internet TeamViewer tetapi, anehnya, banyak pengguna telah melaporkan bahwa mereka dapat menyelesaikan masalah ini hanya dengan kembali ke desain lama program. Ini dapat dilakukan di pengaturan TeamViewer jadi pastikan Anda mengikuti langkah-langkah di bawah ini dan mencoba untuk menyelesaikan masalah konektivitas ini.
- Buka TeamViewer dengan mengklik dua kali ikonnya dari Desktop atau dengan mencarinya setelah membuka menu Start dan mengklik kiri hasil teratas.
- Dari layar beranda, klik tombol Ekstra dari bilah menu dan pilih entri Opsi dari daftar yang akan muncul.
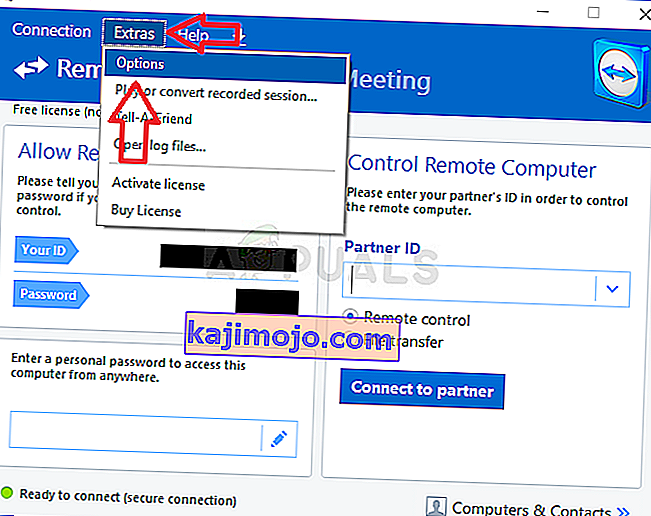
- Arahkan ke tab Lanjutan dalam opsi TeamViewer dari menu navigasi sisi kiri dan periksa di bawah Pengaturan Lanjutan Umum untuk opsi " Gunakan antarmuka pengguna baru ". Pastikan Anda tidak mencentang kotak di sebelahnya sebelum mengonfirmasi perubahan yang telah Anda buat.

- Buka kembali TeamViewer dan periksa untuk melihat apakah TeamViewer “Belum siap. Pesan kesalahan Periksa koneksi Anda ”masih muncul di komputer Anda!


Solusi 5: Tambahkan Pengecualian untuk Berkas Teamviewer_Service.exe
Terkadang alat antivirus gagal mengenali upaya program untuk terhubung ke Internet sebagai tidak berbahaya dan fitur TeamViewer sering diblokir olehnya. Untuk membuktikan kepada antivirus bahwa program tersebut tidak berbahaya, Anda harus menambahkannya ke daftar Pengecualian / Pengecualian!
- Open the antivirus user interface by double-clicking on its icon at the system tray (right part of the taskbar at the bottom of the window) or by searching for it in the Start menu.
- The Exceptions or Exclusions setting is located in different spots concerning different antivirus tools. It can often be found simply without much hassle but here are some quick guides on how to find it in the most popular antivirus tools:
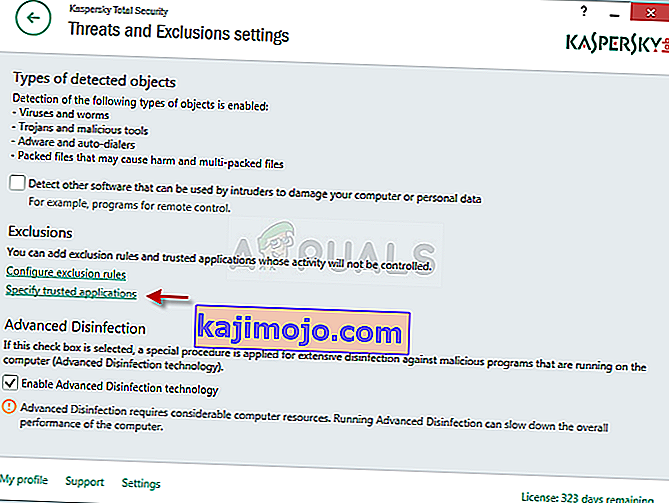
Kaspersky Internet Security: Home >> Settings >> Additional >> Threats and Exclusions >> Exclusions >> Specify Trusted Applications >> Add.
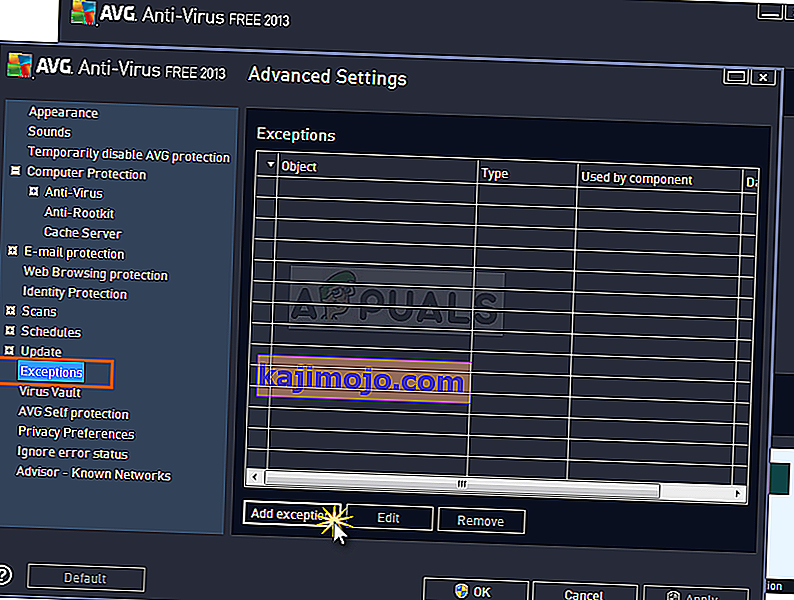
AVG: Home >> Settings >> Components >> Web Shield >> Exceptions.
Avast : Home >> Settings >> General >> Exclusions
- You will need to add the Teamviewer_Service.exe executable in the box which will appear prompting you to navigate to the folder. It should be in the same folder where you decided to install TeamViewer in. By default, it’s:
C:\Program Files (x86)\TeamViewer
- Check to see if you are now able to use TeamViewer without receiving the problematic error message. If it still won’t work, try restarting your computer and try again. The last step would be to uninstall the antivirus and try a different one if the problem persists.


Solution 6: Allow it in Windows Defender Firewall
For TeamViewer’s features to work properly, the app needs to have uninterrupted access to the Internet and its servers to work properly. Windows Defender Firewall is often to blame in such cases and we recommend you make an exception for the Teamviewer_Service.exe executable inside the Windows Defender Firewall!
- Open up Control Panel by searching for the utility in the Start button or by clicking the Search button or the Cortana button at the left part of your taskbar (bottom left part of your screen).
- After Control Panel opens, change the view to Large or Small icons and navigate to the bottom to open the Windows Defender Firewall option.
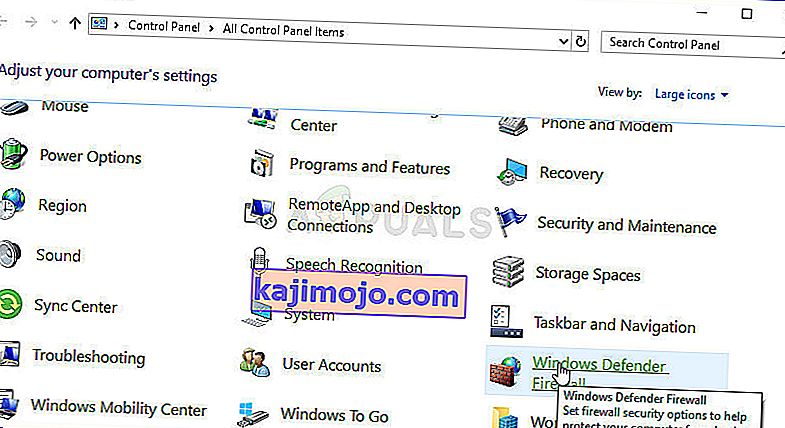
- Click on Windows Defender Firewall and click on the Allow an app or feature through Windows Firewall option from the left side list of options. A list of installed apps should open. Click the Change settings button at the top of the screen and provide administrator permissions. Try locating the executable inside. If it’s not there, click the Allow another app button below.

- Navigate to where you installed TeamViewer (C:\Program Files (x86)\TeamViewer by default) and choose the Teamviewer_Service.exe file.
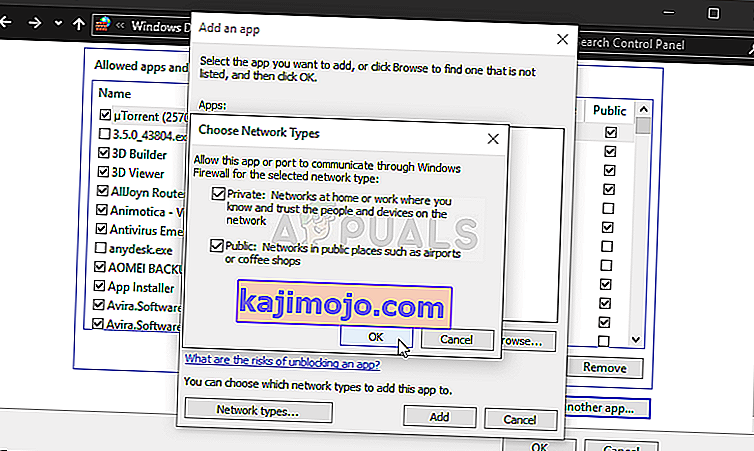
- After locating it, click the Network types button at the top and make sure you check the boxes next to both Private and Public entries before clicking OK >> Add.
- Click OK and restart your computer before checking whether the TeamViewer “Not ready. Check your connection” error message still appears on your computer.


Solution 7: Disable IPv6
Disabling Internet Protocol version 6 connectivity on your computer managed to resolve the problem for many users and it’s an easy way to resolve the problem. This makes this method worthy and you shouldn’t skip it during your troubleshooting process.
- Use the Windows + R key combo which should immediately open the Run dialog box where you should type ‘ncpa.cpl’ in the bar and click OK to open the Internet Connection settings item in Control Panel.
- The same process can also be done by manually opening the Control Panel. Switch the View by setting at the top right section of the window to Category and click on Network and Internet at the top. Click the Network and Sharing center button to open it. Try to locate the Change adapter settings button at the left menu and click on it.
- When the Internet Connection window opens, double-click on your active Network Adapter.
- Then click Properties and locate the Internet Protocol Version 6 entry on the list. Disable the checkbox next to this entry and click OK. Restart your computer to confirm the changes and check to see if the problem persists.


Solution 8: Restart the TeamViewer Service
Stopping the TeamViewer service from running will effectively restart the whole process and many users have reported that it only took them a few minutes to get TeamViewer to work again. Before starting, make sure you have closed TeamViewer completely.
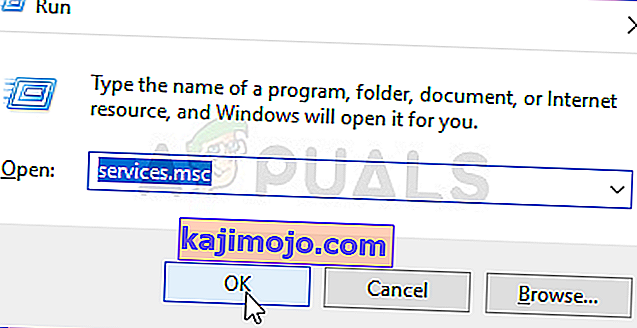
- Open the Run utility by using the Windows Key + R key combination on your keyboard (press these keys at the same time. Type “services.msc” in the newly opened box without the quotation marks and click OK to open the Services tool.
- The alternative way is to open the Control Panel by locating it in the Start menu. You can also search for it using the Start menu’s search button.
- After the Control Panel window opens, change the “View by” option at the top right part of the window to “Large Icons” and scroll down until you locate the Administrative Tools entry. Click on it and locate the Services shortcut at the bottom. Click on it to open it as well.
- Locate the TeamViewer Service on the list, right-click on it and select Properties from the context menu which appears.
- If the service is started (you can check that just next to the Service status message), you should stop it for now by clicking the Stop button in the middle of the window. If it is stopped, leave it stopped until we proceed.
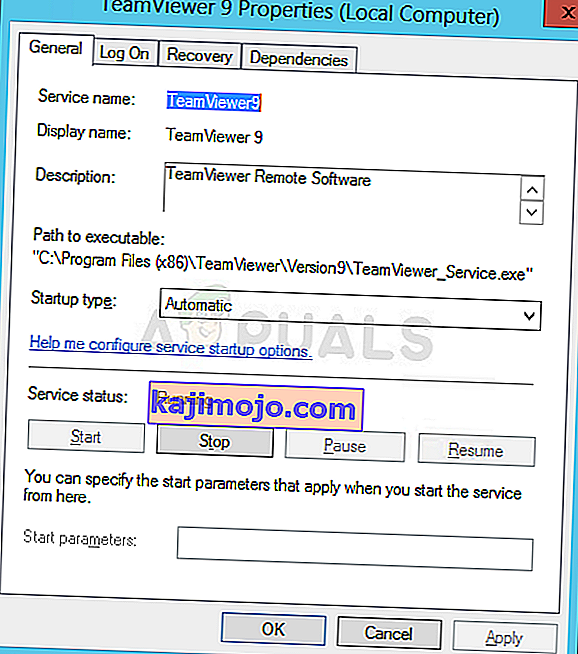
- Make sure that the option under the Startup type menu in the service’s properties window is set to Automatic before you proceed with other steps. Confirm any dialogue boxes which may appear when changing the startup type. Click on the Start button in the middle of the window before exiting.


Solution 9: Reinstall TeamViewer
If all methods above fail to work, reinstalling TeamViewer is the last method which can help you resolve the problem on your computer. It should be fast and painless if you follow all the steps properly! You will also install the latest version which contains the patch to the specific issue you are having!
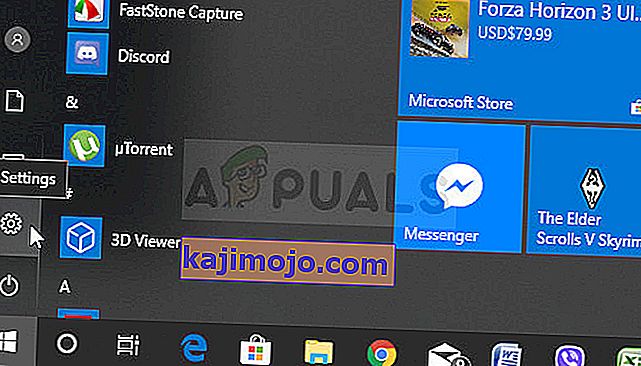
- Click the Start menu and open Control Panel by searching for it simply by typing with the Start menu window open. Alternatively, you can click the cog icon in the lower-left part of the Start menu to open the Settings app if you are using Windows 10.
- In Control Panel, select the View as: Category option at the top right corner of the Control Panel window and click on Uninstall a Program under the Programs section.
- If you are using the Settings app, clicking on Apps should immediately open a list of all installed programs on your PC so wait for a while for it to load
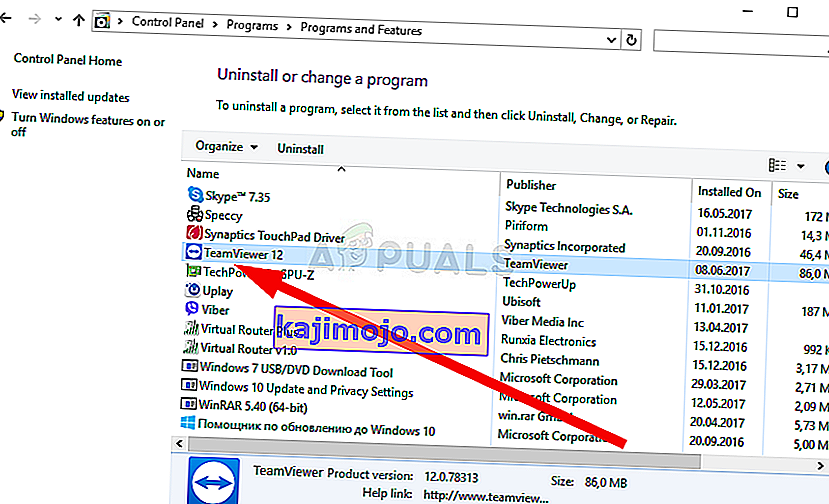
- Locate TeamViewer in Control Panel or Settings and click on Uninstall/Repair. Follow any instructions which appear afterward to uninstall it completely.
- Download the latest version of TeamViewer by visiting this link. Download its setup file, run it from the Downloads folder, follow the instructions on screen, and check to see if the problem persists after reinstalling TeamViewer!

