Beberapa pengguna Windows yang baru saja meningkatkan ke Windows 10, telah membuat keluhan tentang bilah tugas yang benar-benar membeku beberapa kali. Jika ini terjadi, pengguna tidak dapat mengklik elemen apa pun di bilah tugas, yaitu menu mulai, ikon, pemberitahuan. Selain itu, pintasan seperti Windows + R dan Windows + X tidak berfungsi.
Masalah ini bukan penyebab utama karena sangat umum terjadi di Windows. Namun, beberapa telah menautkannya ke Dropbox dan beberapa aplikasi yang tidak berfungsi. Pada artikel ini, kita akan menjelajahi berbagai opsi yang dapat digunakan untuk memecahkan masalah ini. Ini termasuk menjalankan pemindaian SFC, mencopot pemasangan aplikasi tertentu, memulai penjelajah, dan lainnya.
Metode 1: Memulai Ulang Windows Explorer
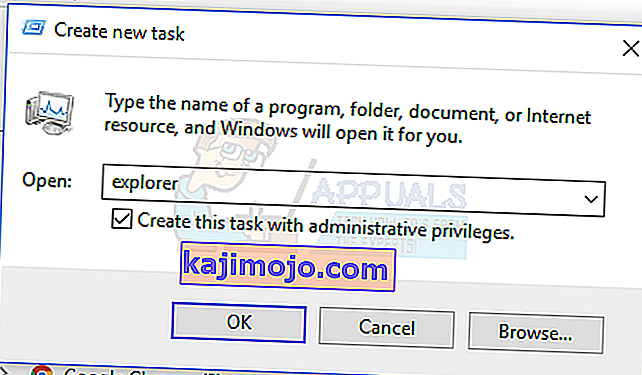
- Tekan tombol Ctrl + Shift + Esc untuk meluncurkan Windows Task Manager.
- Di Task Manager, klik File > Jalankan tugas baru . Ketik explorer di kotak terbuka dan kemudian centang kotak "Buat tugas ini dengan hak akses administratif" dan klik OK .

Alternatifnya, Anda bisa:
- Tekan tombol Ctrl + Shift + Esc untuk meluncurkan Windows Task Manager.
- Cari Explorer di tab proses
- Klik kanan pada entri Explorer dan pilih Restart .
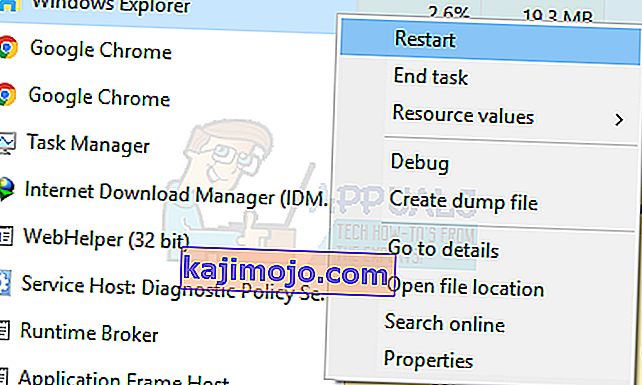
- Explorer akan memulai ulang dan bilah tugas akan mulai berfungsi kembali

Metode 2: Menjalankan Pemindaian SFC
- Tekan tombol Ctrl + Shift + Esc untuk meluncurkan Windows Task Manager.
- Di Pengelola Tugas, klik Mulai> Jalankan tugas baru . Ketik cmd di kotak terbuka dan kemudian centang kotak "Buat tugas ini dengan hak akses administratif" dan klik OK .
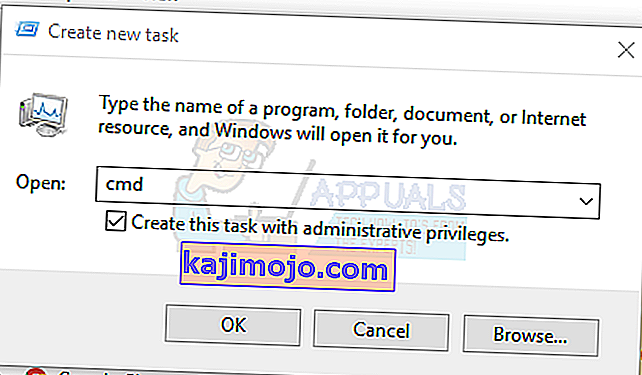
- Di prompt perintah, ketik perintah berikut, dan tekan Enter setelah setiap perintah:
sfc / scannow cabut / Online / Cleanup-image / Restorehealth
Ini akan menjalankan pemeriksaan file sistem dan memperbaiki semua file sistem yang rusak di komputer Anda.
- Nyalakan kembali PC Anda dan periksa apakah bilah tugas yang dibekukan telah berhenti.

Metode 3: Perbaikan Powershell
Gunakan perintah Powershell ini untuk mencairkan taskbar yang dibekukan menggunakan langkah-langkah ini.
- Ctrl + Shift + Esc untuk meluncurkan Windows Task Manager.
- Klik More details , pilih tab Services dan pastikan MpsSvc (Windows Firewall) sedang berjalan.
- Tekan tombol Windows + R untuk membuka prompt Run. Ketik PowerShell di prompt dan tekan Enter.
Jika Run prompt gagal untuk membuka, tekan Ctrl + Shift + Esc kunci untuk meluncurkan Windows Task Manager, klik Start> Run new task . Ketik PowerShell di kotak buka dan kemudian centang kotak "Buat tugas ini dengan hak akses administratif" dan klik OK .
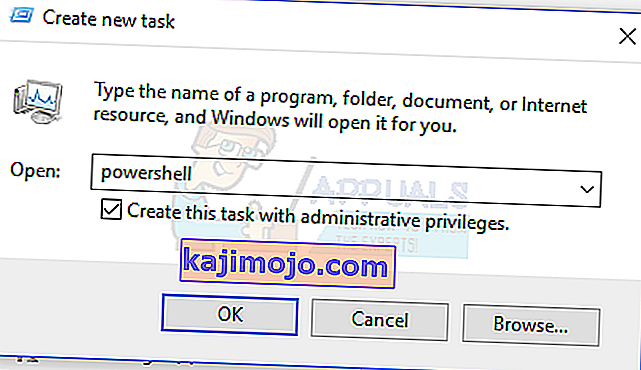
- Di jendela Powershell, tempel perintah berikut dan tekan Enter:
Dapatkan-AppXPackage -AllUsers | Foreach {Add-AppxPackage -DisableDevelopmentMode -Register “$ ($ _. InstallLocation) \ AppXManifest.xml”}. - Bilah tugas Anda harus berfungsi penuh setelah ini.

Metode 4: Aktifkan Manajer Pengguna
Manajer Pengguna yang dinonaktifkan dapat mengakibatkan bilah tugas Windows 10 membeku. Coba aktifkan kembali Pengelola Pengguna dengan langkah-langkah ini.
- Tekan Tombol Windows + R , ketik services.msc dan klik OK . Ini membuka konsol layanan.
- Cari Manajer Pengguna dan klik dua kali.
- Setel jenis Startup ke Otomatis dan Mulai layanan jika sudah dihentikan. Klik OK .

- Mulai ulang PC Anda dan bilah tugas akan berfungsi dengan sempurna saat ini.

Metode 5: Copot Pemasangan Aplikasi
Aplikasi tertentu telah diidentifikasi oleh beberapa pengguna yang menyebabkan bilah tugas berfungsi dengan baik. Aplikasi tersebut adalah Dropbox dan Classic Shell . Jika Anda curiga ada aplikasi yang menyebabkan ini, Anda juga dapat menghapusnya.
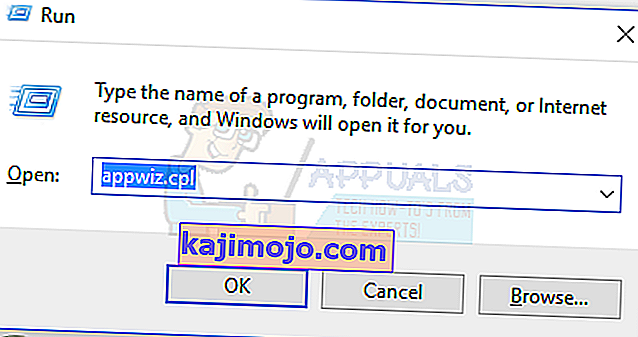
- Tekan tombol Windows + R untuk membuka prompt jalankan. Ketik appwiz. cpl dan tekan Enter .
- Temukan aplikasi dalam daftar aplikasi yang diinstal dan kemudian klik dua kali. Sekarang, ikuti petunjuk untuk menyelesaikan penghapusan instalasi.
- Reboot PC Anda dan kemudian periksa apakah taskbar berfungsi dengan baik sekarang.

Metode 6: Menonaktifkan Item yang Baru Dibuka
Item yang baru dibuka dapat memperlambat peluncuran daftar. Menonaktifkannya membuatnya lebih cepat dan mencegah pembekuan apa pun. Ikuti petunjuk ini untuk menonaktifkan item yang baru dibuka.
- Tekan Win + I untuk membuka aplikasi Pengaturan.
- Navigasikan ke Personalisasi> Mulai
- Geser tombol sakelar di sebelah Tampilkan item yang baru dibuka di Daftar Langsung di Mulai atau bilah tugas untuk mematikannya.

- Bilah tugas Anda seharusnya tidak membeku saat boot pada boot ulang berikutnya

Metode 7: Atur Ulang Layanan Windows 10 Default
Jika saat ini tidak ada metode di atas yang berhasil, coba jalankan skrip ini sebagai administrator dengan mengklik kanan padanya dan memilih Jalankan sebagai administrator . Jika karena alasan tertentu WiFi Anda tidak berfungsi lagi, ikuti langkah-langkah di sini (di Metode 3 - Langkah 2: Opsi 2) untuk memperbaiki masalah WiFi.
Metode 8: Buat Akun Pengguna baru
Dalam beberapa situasi, kesalahan mungkin dipicu jika pengaturan atau konfigurasi akun pengguna Anda belum disetel dengan benar dan juga jika ada kerusakan dalam data konfigurasi ini. Oleh karena itu, sebagai alternatif, Anda dapat mencoba membuat akun pengguna baru di mesin Windows 10 Anda dan kemudian mengimpor data dari akun yang lebih lama nanti jika itu memperbaiki masalah. Untuk melakukannya:
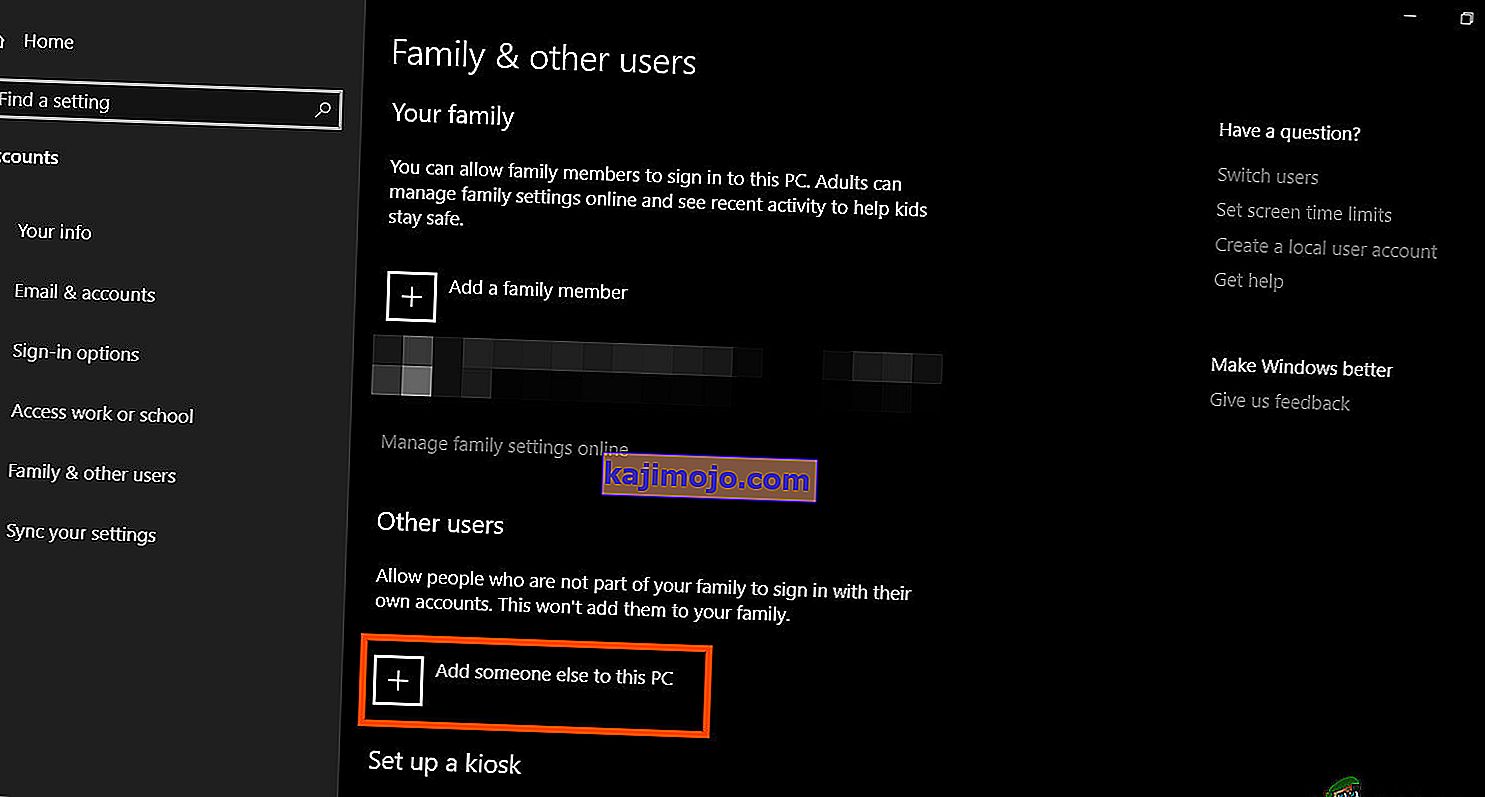
- Tekan "Windows" + "I" untuk membuka pengaturan dan klik opsi "Akun" .
- Di opsi akun, klik tombol "Keluarga dan Pengguna Lain" dari sisi kiri.
- Pilih opsi " Tambahkan Orang Lain ke PC ini " dari menu.
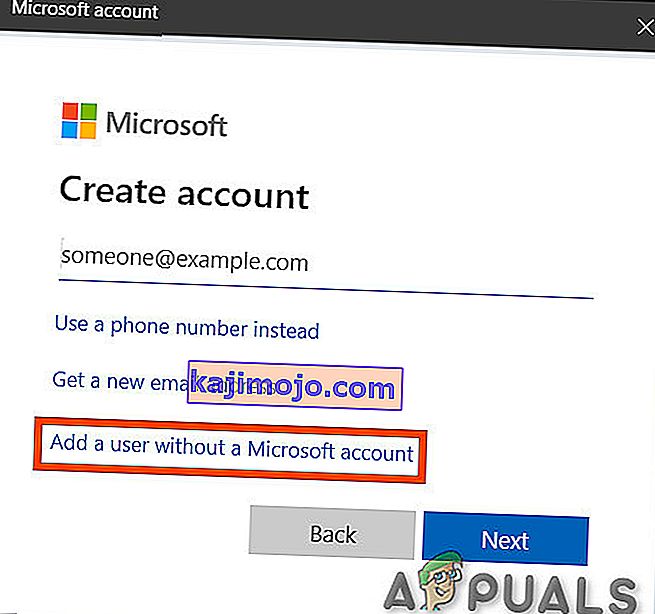
- Klik tombol " Saya tidak memiliki informasi masuk orang ini " di jendela berikutnya.
- Klik pada opsi "Tambahkan pengguna tanpa Akun Microsoft" dari jendela baru yang muncul.
- Masukkan nama pengguna akun pengguna dan tetapkan kata sandi.
- Masukkan pertanyaan keamanan, jawablah, dan kemudian klik pada opsi "Next" .
- Setelah membuat akun ini, klik di atasnya dan kemudian pilih opsi "Ubah Jenis Akun" .
- Klik menu tarik-turun "Jenis Akun ' dan kemudian pilih opsi " Administrator " .
- Simpan perubahan Anda dan login ke akun ini.
- Setelah masuk ke akun, jalankan Steam dan periksa untuk melihat apakah gim berjalan.


Jika hal itu memperbaiki masalah di komputer Anda, pastikan untuk mengimpor data akun pengguna dari akun sebelumnya ke akun baru ini dan terus menggunakannya secara normal.
Metode 9: Mendiagnosis dalam Mode Aman
Terkadang, Anda mungkin telah menginstal beberapa aplikasi pihak ketiga di komputer Anda yang mungkin mencegah Anda menjalankan taskbar atau layanan terkait dengan benar. Selain itu, ada kemungkinan bahkan layanan Windows atau Microsoft mencegah berfungsinya komputer dengan benar. Oleh karena itu, dalam langkah ini, kami akan mendiagnosis masalah ini dalam mode aman dan kemudian kami akan memeriksa untuk melihat apakah masalah ini dapat diperbaiki. Untuk itu:
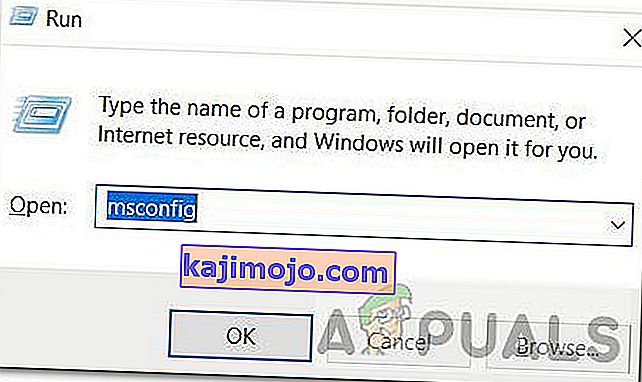
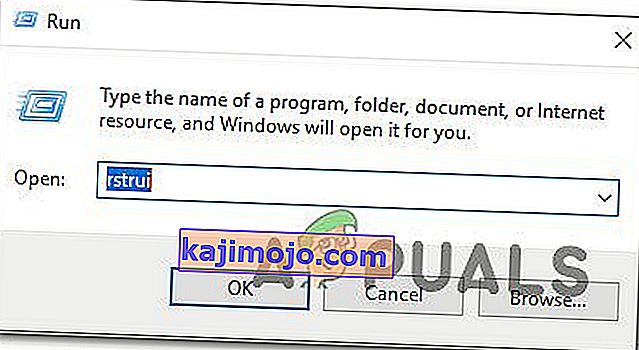
- Tekan " Windows" + " R" untuk meluncurkan prompt jalan.
- Ketik " MSCONFIG" dan tekan " Enter" untuk membuka jendela konfigurasi Microsoft.
- Di jendela ini, klik tab "Layanan" dan hapus centang pada "Sembunyikan semua Layanan Microsoft"
- Setelah tidak mencentang opsi ini, klik tombol "Nonaktifkan Semua" dan klik "Terapkan" untuk menyimpan perubahan Anda.
- Setelah itu, klik tab "Startup" dan kemudian klik tombol "Open Task Manager" untuk menjalankan task manager.
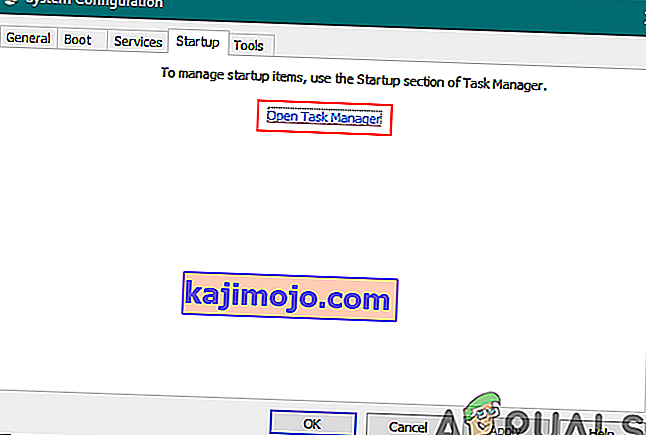
- Di Task Manager, klik pada setiap aplikasi yang telah diaktifkan dan kemudian klik tombol "Disable" untuk mencegahnya diluncurkan saat startup.
- Restart komputer Anda untuk sekarang boot ke mode aman.
- Dalam mode aman, periksa untuk melihat apakah bilah tugas Anda membeku setelah beberapa waktu atau bahkan saat startup.
- Jika bilah tugas tidak membeku dalam mode ini, itu berarti aplikasi atau layanan pihak ketiga yang menyebabkan masalah ini.
- Mulai aktifkan aplikasi satu per satu dan periksa untuk melihat mana yang membuat masalah muncul kembali.
- Jika semua aplikasi baik-baik saja, mulai aktifkan layanan satu per satu dan periksa untuk melihat mana yang membuat masalah muncul kembali.
- Biarkan layanan / aplikasi yang bermasalah dinonaktifkan atau coba instal ulang / perbarui.


Metode 10: Melakukan Pemulihan Sistem
Some users found that performing a simple restore to an earlier working date fixed their issue but you will have to carefully select the restore point to which you will be restoring. It is recommended that you manually go through this process instead of using the automatic restore. In order to perform this step, follow the guide below.
- Press “Windows” + “R” to open the Run prompt.
- Type in “rstrui” and press “Enter” to open the restore management window.
- Click on “Next” and check the “Show more Restore Points” option.
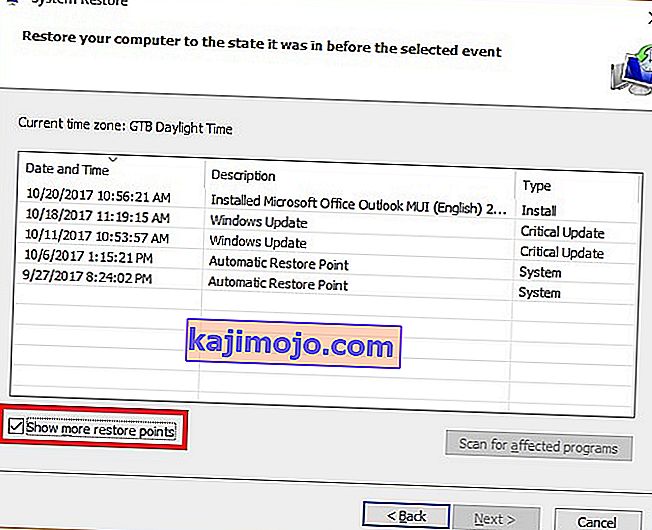
- Select a restore point in the list that is older than the date on which this issue started occurring on your computer.
- Click on “Next” again and follow the on-screen instructions to restore everything back to the date which you selected from the restore window.
- Check to see if doing so fixes the issue with the frozen taskbar.


Method 11: Toggle System Icons
It is possible in some cases that the system icon setting might be glitched on your computer due to which this issue is being triggered. Therefore, in this step, we will be toggling these icons and then we will check to see if doing so fixes the issue. For that:
- Press “Windows” + “I” to open the settings and click on the “Personalization” option.
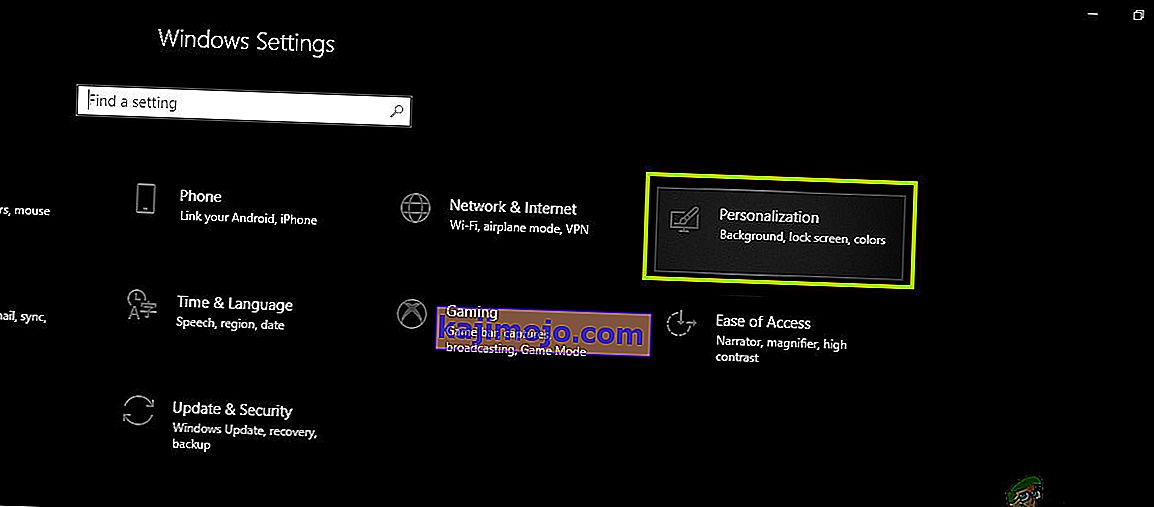
- From the left side, click on the “Taskbar” button.
- Under the “Notifications Area” heading, click on the “Turn System Icons on or off” button.
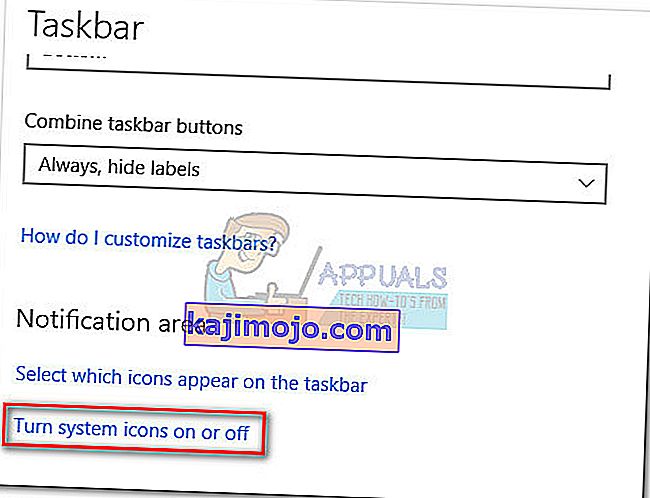
- Toggle all of the icons in the next window one by one by turning them off for a couple of seconds and then turning them back on.
- After completing this process, navigate back to the desktop by closing out of this window.
- Check to see if doing so has fixed the issue.


Method 12: Run Windows Maintenance Troubleshooter
It is possible that there might be some leftover files on your computer due to which there is a shortage of system paging memory or if there are leftover shortcuts from certain applications, that can also prevent the taskbar from functioning correctly. Therefore, in this step, we will be running the Windows Maintenance Troubleshooter and then check to see if doing so fixes this issue. For that:
- Press “Windows’ + “R” to open the Run prompt.
- Type in “Control Panel” and press “Enter” to launch the classical control panel interface.

- Click on the “View By:” option from the top and select the “Large Icons” option from the menu.
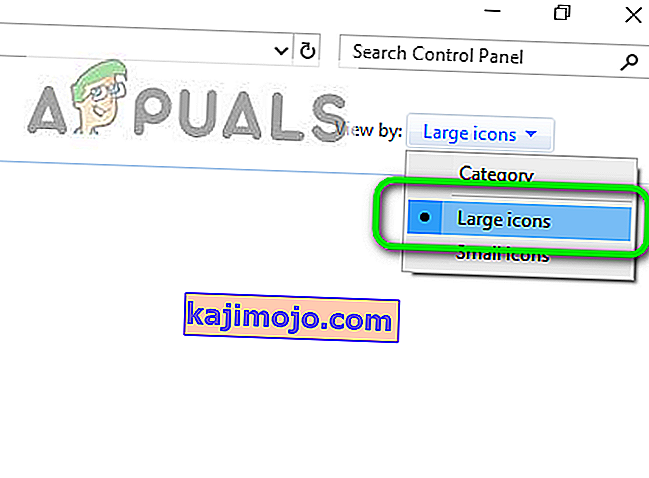
- In the next window, click on the “Troubleshooting” option and then click on the “Run Maintenance Tasks” button.
- In the window that pops up, click on the Next button, and provide administrative privileges to successfully run this task.
- Wait for the Maintenance to be completed and check to see if doing so has fixed the issue with the frozen taskbar.


Method 13: Use DDU to Perform a Clean Install
In some cases, it is possible that the Graphics Card installed on the system might have a faulty driver installed due to which this issue is being triggered. Therefore, in this step, we will be performing a Clean install of the Graphics Driver by uninstalling the Driver using DDU and then we will check to see if doing so has fixed the issue with the Taskbar. For that:
- Make sure to back up any important data before performing this step in case something goes unexpected.
- Download the DDU software from this website.
- After downloading the software, extract the zip file and open the folder where it has been extracted.
- Run the “.exe” file inside the folder and it will automatically further extract inside the same folder.
- Open the newly extracted folder and click on the “Display Driver Uninstaller.exe”.
- Click on the “Select Device Type” dropdown and select “GPU”.
- In the other dropdown, select the manufacturer of your GPU and then click on the “Clean and do not Restart” option.
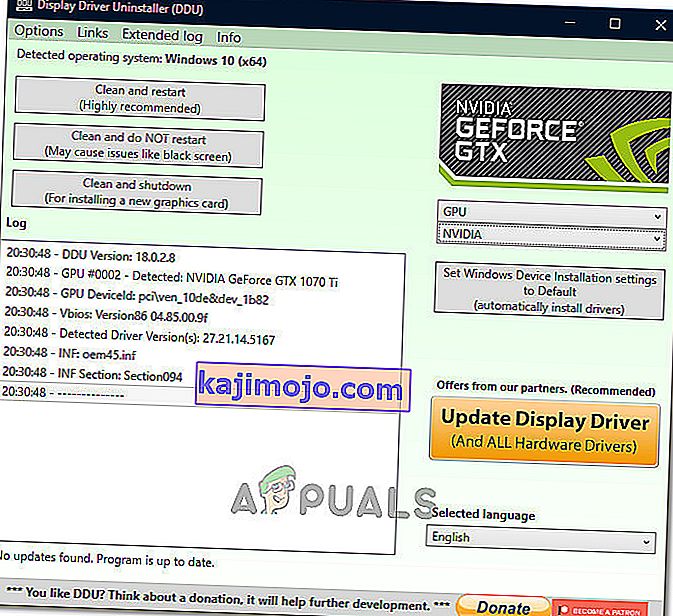
- This will uninstall the device driver for your GPU and it should automatically shift to the Microsoft Basic Visual Adapter.
- After uninstalling this software, download the GPU driver from your manufacturer’s website by specifying your exact make and model.
- Install this software on your computer and then check to see if doing so fixes the taskbar freezing issue on your computer.

Method 14: Stopping Windows Service
In some situations, it is possible that a certain Windows service might need to be stopped from the task manager. Therefore, in this step, we will be preventing it from running in the background as it has likely hanged due to which the taskbar is being frozen. In order to stop this service:
- Press “Windows’ + “R” to open the Run prompt.
- Type in “taskmgr” and press “Enter” to open the Task Manager.
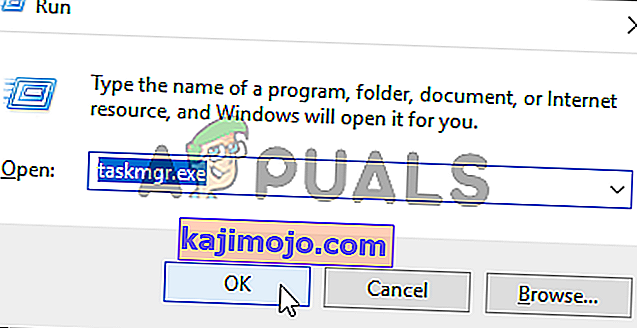
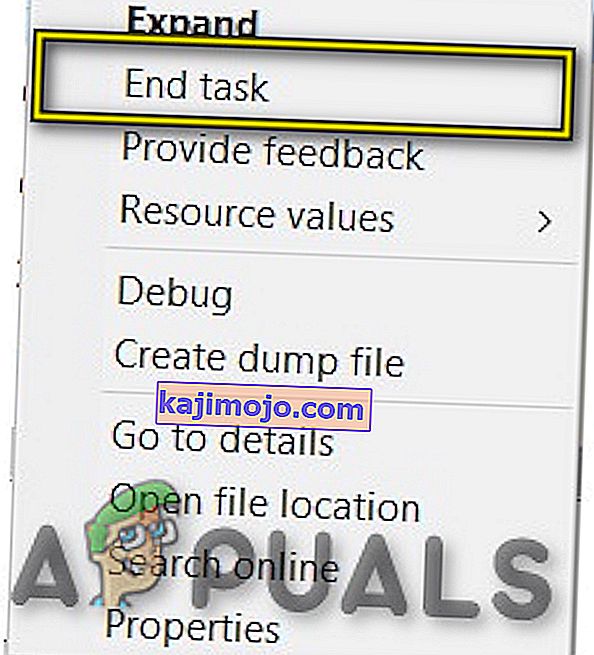
- Click on the “Processes” tab and from the list, click on the “Service Host: DCOM Server Process Launcher” service.
- Click on the “End Task” button and close out of the task manager.
- After closing out of the task manager, check to see if doing so has fixed the frozen taskbar situation.

Method 15: Stop Microsoft Edge and Remove it from Taskbar
In some situations, the default browser that comes installed with Microsoft Windows might just be the culprit behind this whole issue. If you are using another browser as your go-to default browser, you might see that using the Microsoft Edge browser causes issues with the taskbar. Therefore, in this step, we will be stopping Microsoft Edge from the Task Manager and then we will remove it from the taskbar. For that:
- Press “Windows’ + “R” to lauch the Run prompt.
- Type in “taskmgr” and press “Enter” to open the Task Manager.
- Click on the “Processes” tab and from the list, click on the “Microsoft Edge” browser.
- Click on the “End Task” button and close the task manager.
- If the Taskbar is still frozen, restart your computer and repeat this process.
- After doing so, right-click on the Microsoft Edge icon in the taskbar.
- Select the “Unpin from Taskbar” option to remove Microsoft Edge from your taskbar.
- Check to see if doing so fixes the issue.

Method 16: Remove Outdated References
It is possible that your Registry might be plagued with outdated references to an old operating system that you might’ve upgraded from. Even if you have removed the Windows.old folder from your computer, some driver and registry files might still be associated with the “Windows.old” folder which practically doesn’t exist on your computer and this misconfiguration might prevent your computer from working properly. Therefore, in this step, we will be removing it from the registry editor. For that:
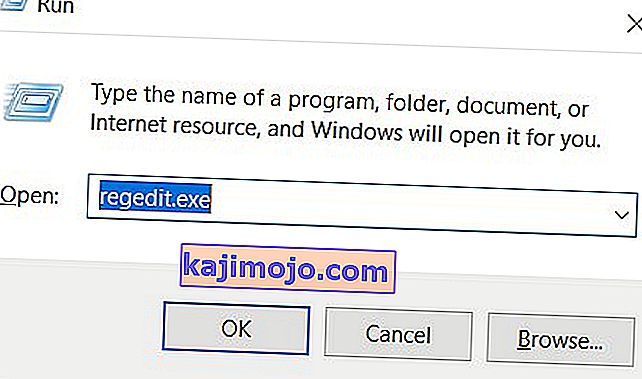
- Press “Windows’ + “R’ to open the Run prompt.
- Type in “regedit” and press “Enter” to open the registry editor.
- Press “Ctrl” + “F” to open the finder and type in the “c:\windows.old” line and press “Enter” to find any registry related entries.
- Delete or remove any such entries that refer to this and run an SFC scan to check for any missing files.
- Make sure to install any missing drivers using Driver Easy and then check to see if the Frozen Taskbar issue has been fixed.

Method 17: Rollback Updates
In some situations, Windows might’ve acquired some updates that are preventing your computer from functioning properly and due to this, the taskbar feature has been broken. Therefore, in this step, we will be rolling back some recently installed updates and then we will check to see if doing so fixes the frozen taskbar issue. In order to do that:
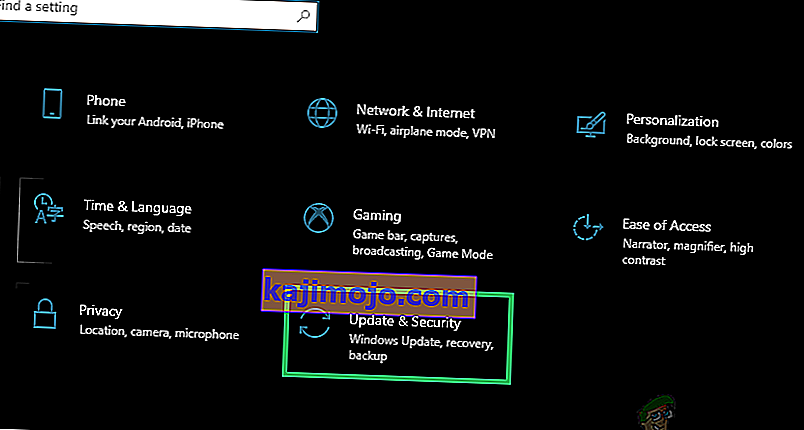
- Press “Windows’ + “I” buttons on your keyboard to open the Windows settings.
- In the Windows Settings, click on the “Update and Security” button and from the left pane, select “Windows Update”.
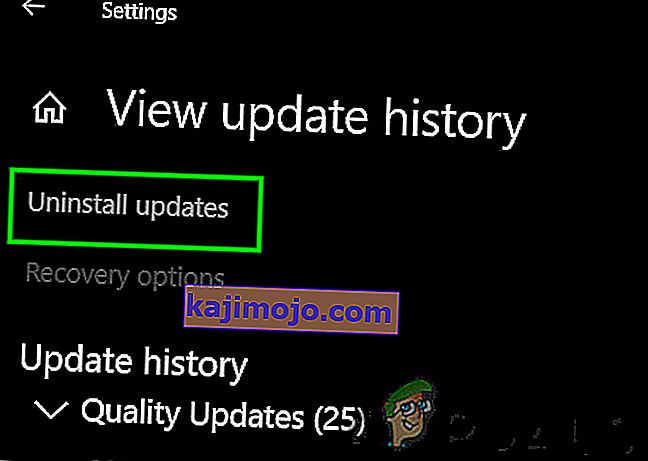
- On the next screen, select the “Update History” button and it should lead to a new window.
- In the new window, there should be an “Uninstall Updates” button and by clicking on it, a prompt should open that should enable you to be able to uninstall an update.
- Follow the on-screen instructions to be able to fully remove the update and check to see if the issue persists after doing so.


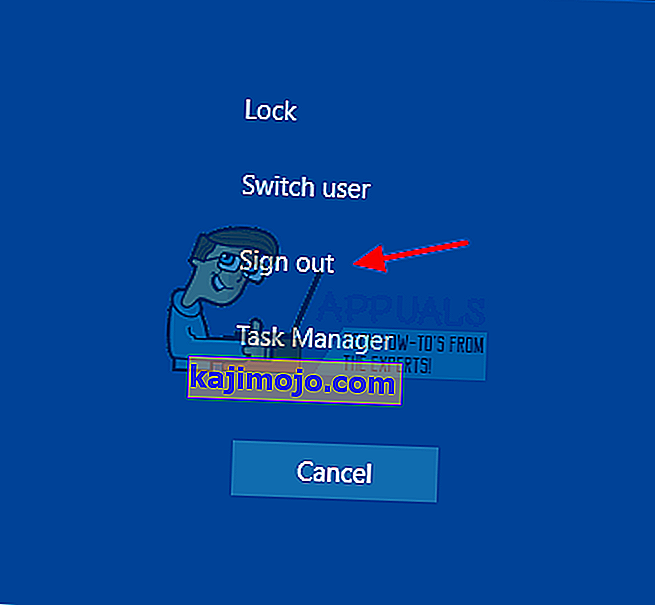
Method 18: Signing out of Account
It is possible that the Windows Taskbar is getting frozen due to a glitch during the account login. Therefore, we can test this out by simply signing out of our account and then signing back in to ensure that the account is logged in properly and that it is properly registered with the Microsoft Servers. In order to do so:
- Press “Ctrl” + “Alt” + “Del” buttons on your keyboard to open up the account options.
- Click on the “Sign out” option from the screen to log out of your account.
- Wait for Windows to completely sign you out of your account and confirm any prompts on your screen to complete the sign-out process.
- Select your account and sign back into your account from the next screen by entering your login details.
- Check to see if doing so has fixed the frozen taskbar issue on your account.

Method 19: Creating Batch File
Most people found that restarting the Windows Explorer fixed their issue but for some of them, it kept coming back after a while. Therefore, in this step, we figured out a way for the people that can solve it by restarting but all they will have to do is click on a batch file present on their desktops. For that:
- Right-click anywhere on your desktop and select the “New>” option.
- Click on the “Text Document” option and a new text document will be created on your desktop.
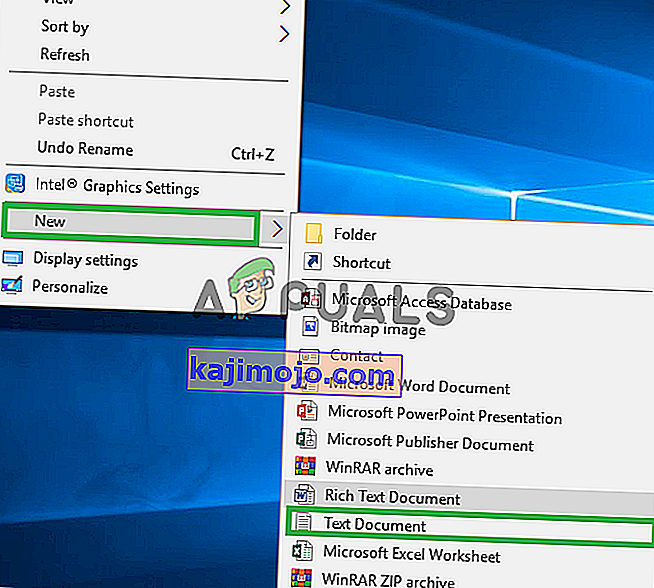
- Open this text document and paste the following lines inside of the text document.
taskkill /f /IM explorer.exe start explorer.exe exit
- Click on the “File” option at the top left of the window and select the “Save As” option.
- Enter the “TaskMRestart.bat” as the file name and select “All Files” from the “File Type” dropdown.
- Save this file on your desktop and exit out of the document.
- Now, double-clicking on this newly saved file should automatically restart File Explorer which should fix the Frozen taskbar issue within a second.
- You can just click on the file whenever the taskbar freezes and it should fix itself.

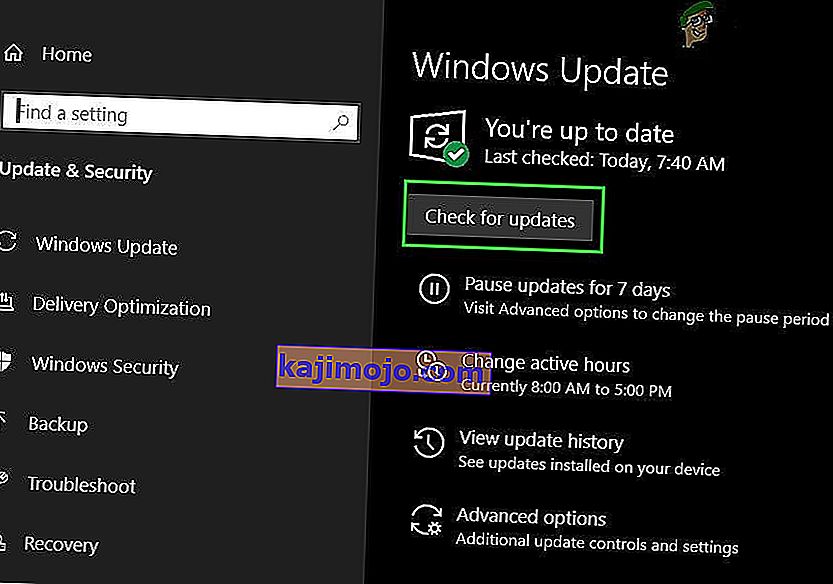
Method 20: Perform an Update
The frozen taskbar issue was a very famous topic on most Microsoft forums and apparently a lot of Microsoft officials took note of it. Therefore, it is possible that this issue might’ve been fixed for some people in recent updates released by Microsoft. Therefore, in this step, we will be checking for any available updates from Microsoft and installing them on our devices. For that:
- Press “Windows” + “I” to open the settings.
- In the settings, click on the “Update and Security” option and then select the “WindowsUpdate” button from the left side.
- In the Windows Update, click on the “Check for Updates” button and a prompt will be registered that will automatically check for any newly available updates.
- Install these updates on your computer by following the on-screen instructions and restart your computer.
- Check to see if installing these updates fixes the issue on your computer.

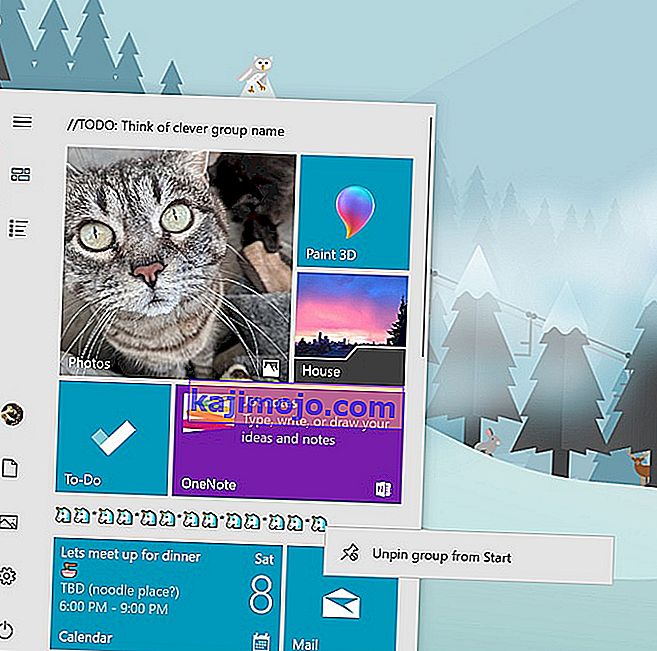
Method 21: Unpinning Items from Start Menu
Some people like to pin important items to the start menu for ease of access and increased productivity. However, as it stands, some Windows users have been facing the frozen taskbar issue due to these pinned items. Therefore, in this step, we will be unpinning some items from the start menu and the taskbar and then we will check to see if doing so fixes the frozen taskbar bug.
- Press the “Windows” button on your keyboard to launch the start menu.
- Inside the start menu, right-click on a tile on the right side of the start menu.
- Select the “Unpin from Start Menu” button to remove the item from the Start menu tiles.
- After removing some items, check to see if the bug is fixed.
- Try removing all the items that can be removed if the bug comes back and check again.
- For a more accurate removal, try removing all the programs from the taskbar and the Start menu that try to connect to the internet, for example, Microsoft Edge, Cortana, News, etc.

Method 22: Disable Items from Bios
It is possible in some cases that the computer’s Bios has been improperly configured due to which the Windows Taskbar is getting frozen time and time again. Therefore, in this step, we will first be booting inside the Bios from which we will disable an option that should get rid of this problem if it was based around the Bios. In order to do so:
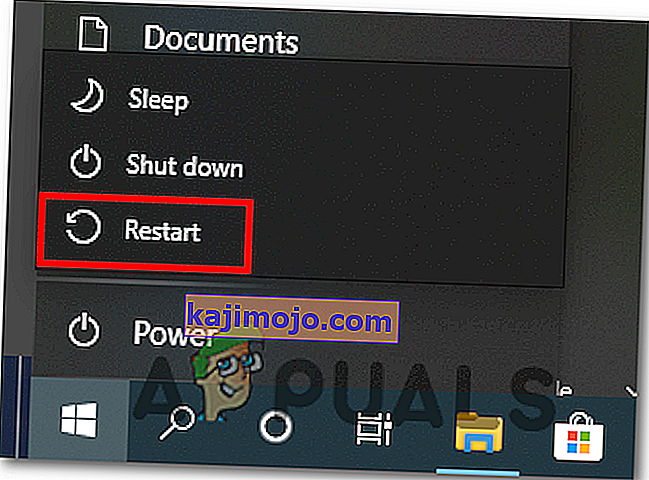
- Press the “Windows” button on your keyboard and click on the “Power Button” icon.
- Select the “Restart” option from the list and wait for your computer to prompt a restart.
- When the computer shuts down and starts booting up, start pressing the “Del”, “F12” or “F11” key depending upon your motherboard to boot inside the computer’s bios.
- From the bios, navigate through different settings until you find the “iGPU Multi-Monitor” feature.
- Disable this feature inside the Bios and boot back into Windows.
- Check to see if disabling this feature worked and fixed the frozen taskbar error.
