Masalah layar hitam pada Windows 10 biasanya terjadi setelah peningkatan atau ketika Pembaruan Windows otomatis menginstal pembaruan pada sistem Anda. Karena layar hitam ini kemungkinan besar merupakan masalah perangkat keras (GPU), kami perlu menilai dan memecahkan masalah berbagai pengaturan untuk mendiagnosis dan memperbaikinya.

Saat ini, PC semakin canggih dengan banyak kartu grafis untuk penggunaan berat. Jadi, jika Anda memiliki kartu grafis selain pengontrol Grafis onboard Intel , Anda mungkin mengalami masalah boot ini ke layar hitam . Terkadang, Windows menganggap ini seolah-olah ada dua monitor yang terpasang ke sistem. Jadi, Windows memuat sinyal keluaran ke Layar Hitam.
Sebelum kita membahas pemecahan masalah yang ekstensif; kita perlu memeriksa beberapa pengaturan dasar. Jika Anda menggunakan beberapa monitor, putuskan / sambungkan kembali dan uji dengan layar utama Anda. Jika ini menyelesaikan masalah; Anda beruntung. Jika tidak, lanjutkan dengan langkah-langkah di bawah ini:
Metode 1: Perbaiki secara membabi buta
Metode ini adalah tentang memperbaiki masalah secara membabi buta karena Anda tidak dapat melihat apa pun di layar hitam.
- Saat Windows macet di layar hitam, tunggu kursor mouse putih muncul di layar. Anda dapat memeriksa keberadaannya dengan menggerakkan mouse-pad.
- Setelah kursor muncul di layar, tekan spasi pada keyboard Anda dan tekan tombol ctrl satu kali pada keyboard. Masukkan kata sandi login atau kode pin secara membabi buta (Anda tidak dapat melihat di layar hitam) . Itu akan masuk ke Windows menggunakan kredensial Anda.
Jika Anda tidak dapat melihat desktop setelah masuk ke akun Anda dan Anda terjebak di layar hitam, tekan Win + P + Tombol Panah Bawah (Dua kali) pada keyboard dan masukkan lagi detailnya.
Metode 2: Siklus Daya
Jika itu adalah laptop dengan baterai yang dapat dilepas pengguna, maka;
- Keluarkan baterai.
- Cabut adaptor daya.

- Tekan & Tahan tombol Daya selama 10 detik
- Lepaskan tombol power.
- Hubungkan kembali pengisi daya dan coba hidupkan.
Uji, dan lihat apakah masalah telah teratasi; jika tidak, lanjutkan ke Metode 4
Metode 3: Matikan Fast Startup
Windows 10 dirilis dengan fitur Fast Startup. Seperti namanya, ini memungkinkan boot cepat sistem operasi sehingga Anda dapat melanjutkan pekerjaan atau bermain dengan cepat.
CATATAN: Fitur Fast Start-up hanya bekerja saat Anda menjalankan Shutdown lalu Nyalakan sistem Anda, fitur ini tidak berlaku saat Anda menjalankan Restart .
Untuk mematikan opsi start-up cepat; ikuti langkah iniBoot menggunakan Media Instalasi Windows 10 Anda. Anda mungkin perlu mengubah urutan boot dari bios.
lihat: cara membuat media windows 10 yang dapat di-boot
- Klik Perbaiki Komputer Anda di bagian bawah
- Klik Troubleshoot
- Klik pada Opsi lanjutan
Catatan: Jika metode ini tidak berhasil, coba klik "Kembali ke Versi Sebelumnya" dan ikuti petunjuk di layar.
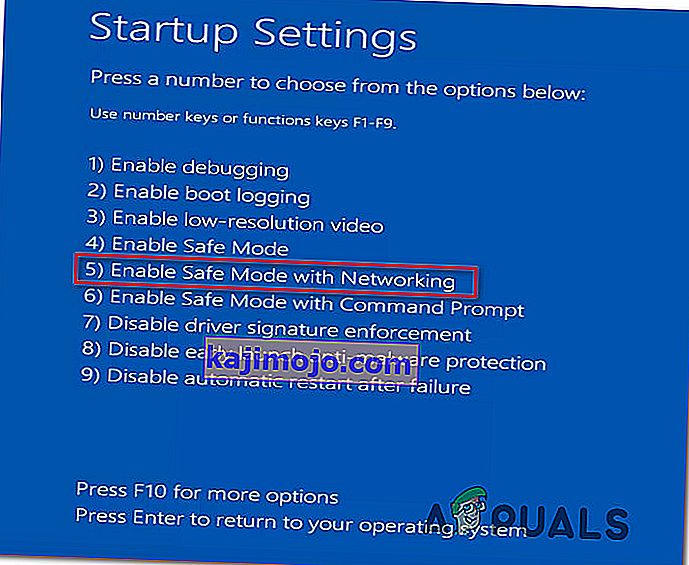
- Klik pada Pengaturan Startup
- Klik Restart
- Pilih mode Aman dengan Jaringan
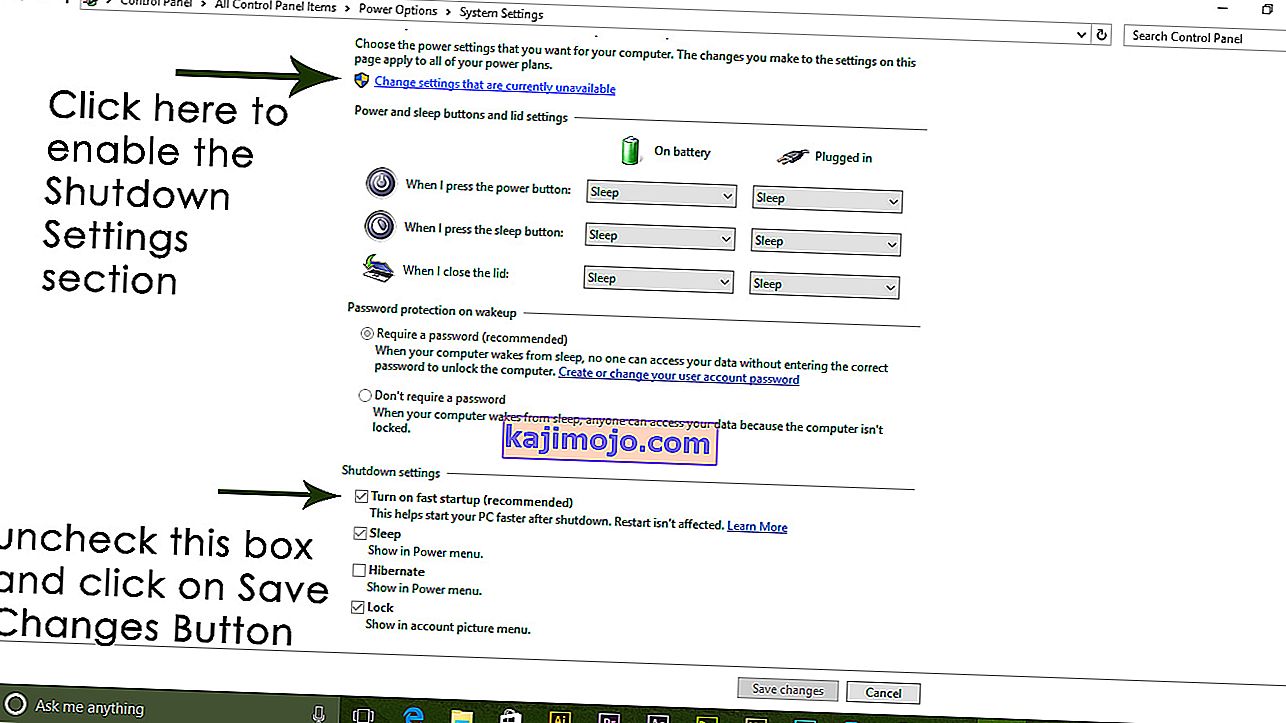
- Ketika PC mulai Pergi ke panel Kontrol ;
- Pilih Opsi Daya ; Pilih Choose What the Power Buttons Do di sebelah kiri Anda.

Di sini, gulir ke bawah dan temukan opsi Fast Startup dan hapus centang .
Metode 4: Copot Pemasangan Adaptor Tampilan
Saat Anda melihat layar hitam:
- Pegang tombol CTRL + ALT + DEL bersama-sama untuk melihat apakah Task Manager muncul. Jika ya, klik File -> New -> dan ketik explorer.exe
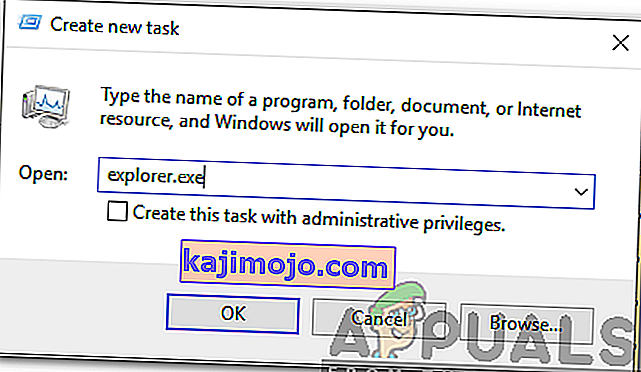
- Jika itu membuka jendela Explorer; login dan hapus instalan perangkat lunak antivirus / kartu grafis lalu instal ulang.
Catatan: Anda juga dapat memilih untuk menonaktifkan sementara Antivirus daripada mencopotnya.
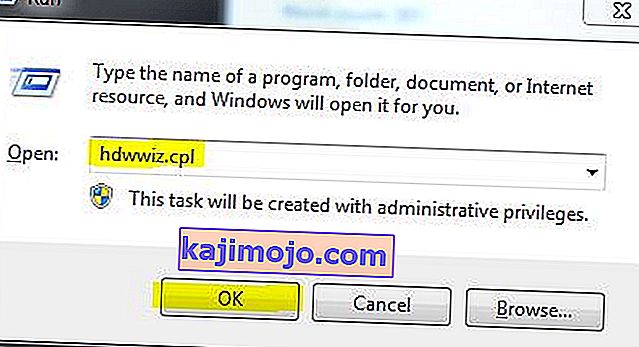
- Untuk Uninstall Graphics / Display adapter; jika CTRL + ALT + DEL berhasil dan Anda melihat jendela explorer, tahan tombol win dan tekan R.
- Ketik hdwwiz.cpl dan klik OK
- Catat nama adaptor layar Anda;
- Perluas Display Adapters -> Pilih Uninstall
Setelah dicopot, buka situs pabrikan untuk mengunduh driver terbaru. Reboot & UJI
Metode 5: Kembalikan sistem Anda ke default pabrik
Metode ini akan menghapus semua data Anda dan meletakkan / menginstal sistem operasi asli yang disertakan dengan komputer Anda. Karena ada korupsi; dan jika data tidak penting kita dapat mengembalikannya kembali ke default pabrik kemudian lakukan instalasi Windows yang bersih. Opsi peningkatan mungkin tidak lagi ada setelah ini.
Lihat manual sistem Anda untuk instruksi pengembalian pabrik.
Metode 6: Cukup restart komputer Anda
Beberapa pengguna Windows 10 yang menderita masalah layar hitam di laporan sebelumnya yang hanya mematikan komputer mereka menggunakan tombol Power -nya dan kemudian memulainya kembali melakukan trik dan menyingkirkan masalah tersebut untuk mereka. Walaupun kedengarannya aneh, solusi ini layak untuk dicoba.
Metode 7: Perbarui driver GPU Anda ke versi terbaru
Windows 10 adalah langkah besar dari versi Windows sebelumnya, itulah sebabnya semua produsen GPU harus membuat driver yang sepenuhnya baru yang dirancang khusus untuk Sistem Operasi baru. Tidak memiliki driver yang kompatibel dengan Windows 10 yang diperbarui di komputer Anda adalah hal lain yang dapat menyebabkan komputer Anda terpengaruh oleh masalah layar hitam. Jika driver yang ketinggalan jaman berada di belakang masalah layar hitam dalam kasus Anda, yang perlu Anda lakukan adalah pergi ke situs web resmi pabrikan komputer Anda atau pabrikan GPU Anda dan unduh driver terbaru untuk GPU Anda (mereka harus tersedia di kedua lokasi). Pastikan driver yang Anda unduh dirancang khusus untuk Windows 10 untuk memastikan keberhasilan solusi ini.
Metode 8: Ubah kecerahan laptop Anda menjadi apa pun kecuali 100%
Pada laptop yang memiliki kartu grafis kelas atas dan diperbarui ke Windows 8, masalah layar hitam sering muncul dengan sendirinya saat dicolokkan ke stopkontak AC. Jika itu masalahnya, cukup buka Start Menu , cari pengaturan daya Lanjutan , buka Pengaturan daya tingkat lanjut dan ubah kecerahan layar laptop Anda ketika dicolokkan ke apa pun kecuali 100% (bahkan 99% akan dilakukan) akan menghilangkan layar hitam masalah.
Metode 9: Jika Anda memiliki dua kartu grafis, nonaktifkan satu kartu grafis
Perbaikan yang layak untuk masalah layar hitam bagi orang-orang yang komputernya memiliki kartu grafis derek - kartu grafis onboard yang disertakan dengan komputer dan kartu grafis yang telah mereka tambahkan ke dalamnya (seperti kartu grafis Nvidia atau AMD) - adalah nonaktifkan kartu grafis onboard. Ternyata, memiliki dua kartu grafis di komputer Windows 10 bisa mengakibatkan bentrok yang akibatnya melahirkan masalah layar hitam. Jika demikian, cukup masuk ke Device Manager , perluas bagian Display adapters, klik kanan pada kartu grafis onboard dan klik Nonaktifkan harus memperbaiki masalah.
If you do not see your onboard graphics card in the Display adapters section, click on View in the top left of the Device Manager dialog and click on Show hidden devices. This will make your onboard graphics card (or, in some cases, cards) visible, and you can then right-click on it and click on Disable.
Method 10: Refresh your computer
The infamous black screen issue on Windows 10 can also be fixed by simply refreshing your computer. Refreshing your computer has almost entirely the same effect as resetting it to factory settings, with the exception of the fact that a refresh only deletes installed programs and applications and keeps your personal data whereas a reset gets rid of everything on your computer. To refresh a Windows 10 computer, you need to:
- Open the Start Menu.
- Click on Settings.
- Out of the array of different options provided, click on Update & Security.
- Click on Recovery in the left pane.
- In the right pane, click on the Get started button under the Reset this PC
- When provided with a choice to either keep your files or remove everything, click on Keep my files.
Method 11: Correcting User Shell
In some cases, the User shell might be preventing the user from being able to boot safely into their computer. In certain situations, the user shell configuration inside the registry might get corrupted due to which this black screen issue can occur. Therefore, in this step, we will be correcting this user shell entry. In order to do that, follow the steps below.
- Boot your computer and wait for the black screen to appear.
- Press “Ctrl” + “Alt” + “Del” and select the “Task Manager” option.
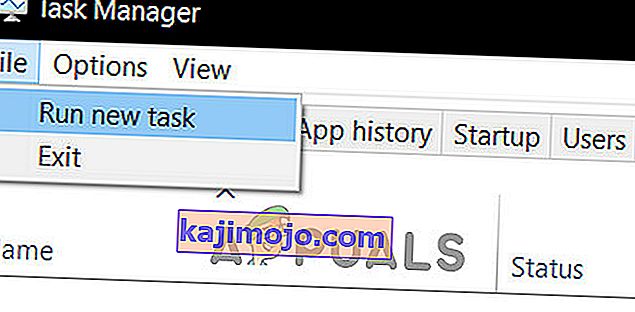
- Click on the “File” option on the top left of the task manager and select “Run New Task” from the list.
- Type in “regedit” and press “Enter” to open it.
Computer\HKEY_LOCAL_MACHINE\SOFTWARE\Microsoft\Windows NT\CurrentVersion\Winlogon
- Double click on the “Shell” entry on the right pane.
- Type in “Explorer.exe” in the Value data field and save your changes.
- Press “Ctrl” + “Alt” + “Del” again and click on the “Power Options” icon on the lower right side.

- Select “Restart” from the menu and wait for your computer to be restarted.
- Check to see if the issue persists after restarting the computer.
Method 12: Stopping Service
There is a specific service that prevents the computer from being able to function properly in some cases and stopping it can prevent the black screen issue from occurring. Therefore, in this step, we will be stopping this service. For that:
- Press “Ctrl” + “Alt” + “Del” and select the “Task Manager” option.
- Click on the “File” option on the top left of the task manager and select “Run New Task” from the list.
- Type in “services.msc” and press “Enter” to open it.
- Scroll through this list and look for the “RunOnce32.exe” or the “RunOnce.exe” entry. Also, do this same process for the “App Readiness” Service.
- Right-click on it and select “Stop”.
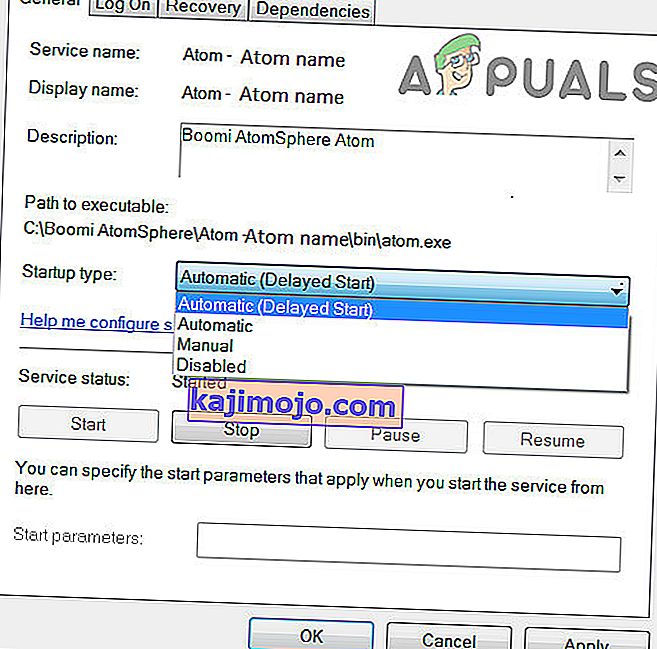
- Double click on it and change its startup type to “Disabled”.
- Wait for the service to be stopped completely and restart your computer.
- Check to see if the issue persists after stopping it completely.
Method 13: Renaming Files
In certain cases, the files in some Windows’ folders might have gotten corrupted due to which this black screen issue is being triggered. Therefore, in this step, we will be renaming these files and then check to see if the issue still persists.
- Press “Ctrl” + “Alt” + “Del” on the black screen.
- Click on the “Task Manager” option and then select “File”.
- Select the “Run New Task” option and then type in “cmd”.
- Type in the following command one by one for each file to rename it.
rename “(File Path) (File Name)” “(New Name)”
- Rename the following files to anything except their original names.
C:\ProgramData\Microsoft\Windows\AppRepository\StateRepository-Deployment C:\ProgramData\Microsoft\Windows\AppRepository\StateRepository-Deployment C:\ProgramData\Microsoft\Windows\AppRepository\StateRepository-Deployment C:\ProgramData\Microsoft\Windows\AppRepository\StateRepository-Machine C:\ProgramData\Microsoft\Windows\AppRepository\StateRepository-Machine C:\ProgramData\Microsoft\Windows\AppRepository\StateRepository-Machine
- Check to see if the issue persists after making these changes.
- If it still does, try the following code to just fix it.
cd "ProgramData\Microsoft\Windows\AppRepository" ren "StateRepository-Deployment.srd" "StateRepository-Deployment-Corrupted.srd" ren "StateRepository-Deployment.srd-shm" "StateRepository-Deployment-Corrupted.srd-shm" ren "StateRepository-Deployment.srd-wal" "StateRepository-Deployment-Corrupted.srd-wal" ren "StateRepository-Machine.srd" "StateRepository-Machine-Corrupted.srd" ren "StateRepository-Machine.srd-shm" "StateRepository-Machine-Corrupted.srd-shm" ren "StateRepository-Machine.srd-wal" "StateRepository-Machine-Corrupted.srd-wal"
- Check to see if the issue persists.
Method 14: Replacing Profile Cache
It is possible the Profile cache for your current user account has either gone missing from some locations or it has been corrupted in certain locations due to which this issue is being triggered. Therefore, in this step, we will be replacing this profile cache after copying it from a location. For that:
- Create a new user account before doing so and log into that.
- Restart your computer in safe mode.
- Log in to your new profile.
- Navigate to the following location and copy the folder named “caches”.
C:\Users\{working-user-profile-name}\AppData\Local\Microsoft\Windows\Caches - Paste this folder in the following location.
C:\Users\{broken-user-profile-name}\AppData\Local\Microsoft\Windows\Caches. - Check to see if the issue persists.
Follow the onscreen instructions and dialogs, and once you are done, your computer will have been refreshed and the black screen issue will be no more.
You can further try to:
- Boot your computer in safe mode and check if the issue persists over there. This will help you to isolate these issues from a specific app that is causing it.
- Press “Windows” + “P” to switch displays that might fix this.
- Update your Bios
- Disconnect the Second monitor
- Try to use an HDMI cable for connection instead of a DVI or VGA one.
- When in the black screen, press the “Windows’ + “Ctrl” + “Shift” + “B” keys to refresh the Graphics Driver.
- You can also try to perform a Startup Repair.
- Try to create a new user account using the last methods listed in this article.
- Lakukan pemindaian SFC dan DISM.