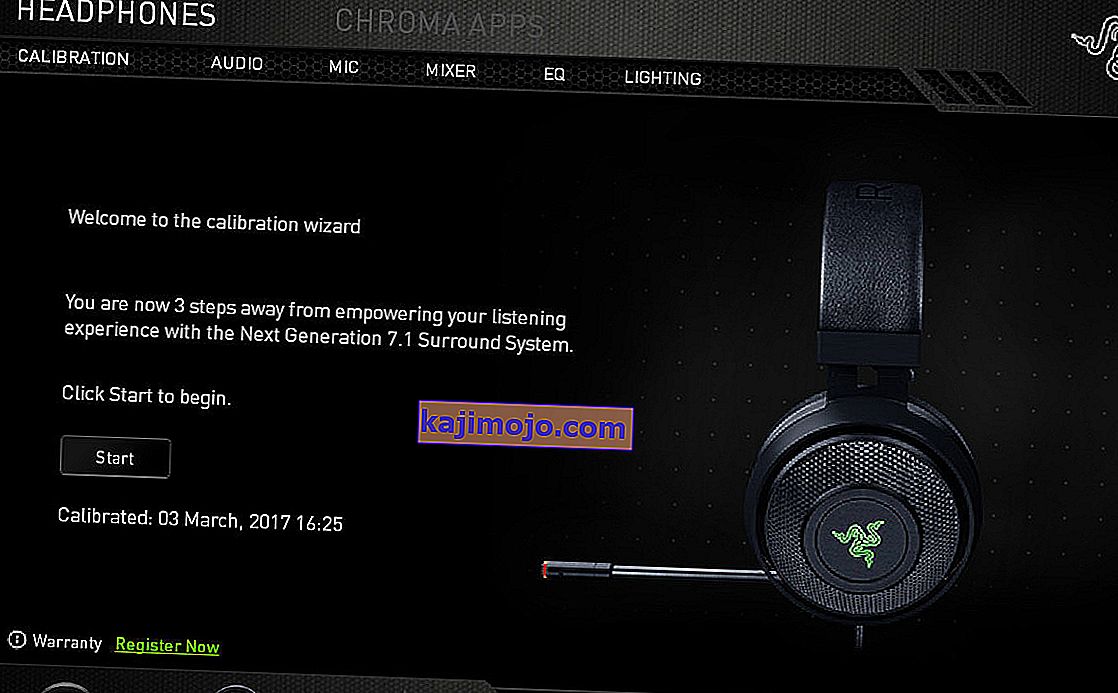
The Kraken headset is one of the flagship headsets produced by the gaming industry giant Razer. It is big and when we talk big, we mean around 27 centimeters when they are work. It has a virtual surround system embedded as well as superior sound quality. It is one of the most popular headsets in the market right now.

Despite being so popular and top-notch, Kraken is now facing a mic problem for quite a while now. Numerous users report that they are unable to speak in-game as well as in other applications such as Skype. One prominent gaming platform where this problem is being experienced is Steam. There are a number of different reasons why this behavior might come into play; incorrect drivers might be installed or you might not have selected Kraken as your default audio device. Unity has officially acknowledged this problem and is working on a fix. Until then, feel free to try our solutions.
Solution 1: Rolling back Realtek High Definition Audio
Realtek is known to provide audio solutions to major computer manufacturers and is renowned for providing great audio devices. However, there are many cases reported where the latest drivers of the audio device rendered Kraken mic unusable. In this case, we can try rolling back the driver and see if this does the trick for us.
- Press Windows + R, type “devmgmt.msc” in the dialogue box and press Enter.
- Once in the device manager, expand “Audio inputs and outputs” category and click on Realtek Digitial Output and select“Properties”.

- Once the properties are opened, click on the “Driver” tab and select Roll Back Driver if it is visible. If it is, it means that the driver was updated and it may be because of this the mic is not working. If it isn’t greyed out, you can download another version from the internet and click on Update driver and attempt to update manually.

- After updating the driver, restart your computer and check if the problem got solved.
- If this method doesn’t work, you can navigate to the same category in device manager, right-click on your Kraken headset and select “Uninstall”. This will uninstall the headphones completely from your system. Now disconnect the headphones and plug them back in and reinstall the drivers.
Solution 2: Uninstall all Razer related Software
There are numerous cases where software released by the manufacturer itself conflicts with the product. This usually happens after an update to Windows is installed on the computer. What we can do is try uninstalling the software and see if this does any trick.
- Press Windows + R, type “appwiz.cpl” in the dialogue box and press Enter. Here all the applications installed on your computer will be listed. Right-click on all Razer software and uninstall them one by one.

After uninstalling all software, restart your computer and check if the problem at hand got solved. One particular software that was known to cause problems is called “Razer Synapse”.
Solution 3: Checking if correct Mic is active
Jika kedua metode di atas tidak berfungsi, itu mungkin berarti mikrofon yang benar tidak dipilih sebagai perangkat mikrofon saat ini di komputer Anda. Jika ada beberapa mikrofon yang tersedia, sistem operasi mungkin memilih mikrofon lain sebagai default. Anda dapat memeriksa properti headset dan memastikannya disetel dengan benar.
- Klik kanan pada ikon " suara " yang ada di bilah tugas Anda dan pilih " Properti ".
- Sekarang pilih tab "rekaman". Di sini semua perangkat perekam di komputer Anda akan terdaftar. Pilih Razer Kraken dari daftar opsi, klik kanan dan setel sebagai perangkat default . Sekarang nonaktifkan semua mikrofon lain dari komputer Anda.

- Tekan Terapkan untuk menyimpan perubahan. Sekarang klik kanan pada mikrofon dan pilih "Properties".
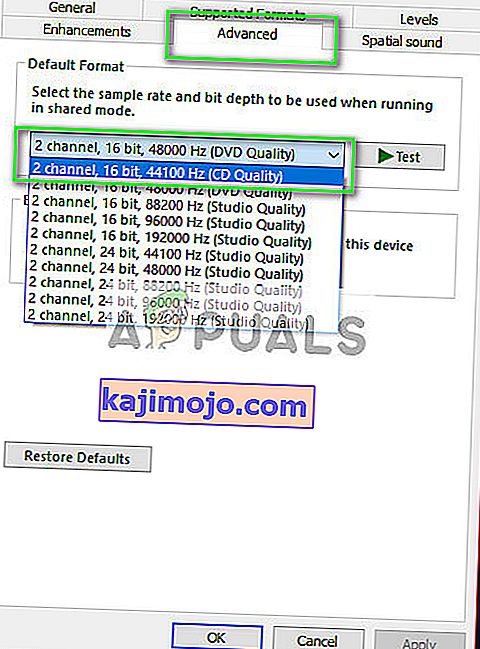
- Arahkan ke tab Advanced dan pilih format default terendah yang tersedia. Ini mungkin akan menjadi "2 saluran, 16 bit, 44100 Hz (Kualitas CD)" .

- Setelah membuat semua perubahan, mulai ulang komputer Anda, sambungkan kembali headset dan periksa apakah masalah yang dihadapi sudah terpecahkan.
Solusi 4: Menjalankan aplikasi dalam mode tinggi
Bukan hal baru untuk mengetahui bahwa kontrol akses pengguna Window memiliki bagian bug dan gangguan. Sebelum Anda mulai mendiagnosis masalah perangkat keras, sebaiknya coba jalankan aplikasi dalam mode administrator. Dengan cara ini aplikasi akan memiliki akses ke semua perangkat keras yang terhubung.
- Arahkan ke direktori aplikasi. Dalam kasus steam, direktorinya mungkin terlihat seperti berikut ini.
“C: \ Program Files (x86) \ Steam \ steamapps \ common \ Comedy Night”
- Sekarang klik pada tab Kompatibilitas dan periksa baris Jalankan program ini sebagai administrator .

- Tekan Terapkan untuk menyimpan perubahan dan keluar. Nyalakan ulang komputer Anda, pasang kembali headphone Anda dan lihat apakah Anda dapat mengakses mikrofon.
Solusi 5: Memeriksa Port dan Perangkat Keras
Sekarang jika semua solusi di atas gagal, itu mungkin berarti ada kesalahan perangkat keras, Kesalahan perangkat keras tidak hanya mencakup port Anda tetapi juga termasuk jack Mic Anda. Anda dapat bermain-main dengan mencolokkan jack ke beberapa port audio lainnya. Selain itu, Anda harus memastikan bahwa dongkrak dalam kondisi kerja.
Anda juga dapat melepas komponen USB dan menggantinya dengan kabel yang memiliki jack audio. Ini akan memastikan bahwa semua perangkat keras berfungsi seperti yang diharapkan dan tidak ada masalah yang terlibat.
Solusi 6: Memilih Mikrofon yang Sesuai di Realtek Audio Manager
Dalam beberapa kasus, Mikrofon mungkin tidak dipilih dengan benar di Realtek Audio Manager. Oleh karena itu, pada langkah ini, kami akan memilihnya sebagai mikrofon. Untuk itu:
- Buka Realtek Audio Manager dan klik pada tab "Microphone" .
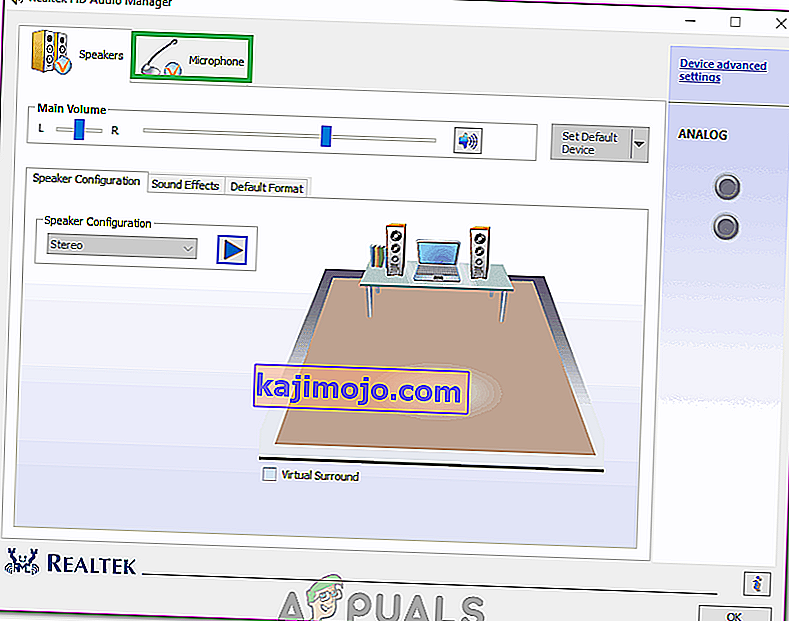
- Di sini, klik dropdown dan pilih Mikrofon Anda dari daftar.
- Simpan perubahan Anda dan periksa untuk melihat apakah masalah tetap ada.

Anda juga harus membuka pengaturan aplikasi dan melihat apakah mikrofon yang benar dipilih di sana. Selain itu, Anda dapat mencoba menghubungkan Headphone tanpa splitter untuk memeriksa apakah itu memperbaiki masalah.