Beberapa pengguna Windows tidak dapat mencari dan mengunduh pembaruan baru untuk OS mereka. Sebagian besar pengguna yang terpengaruh melaporkan bahwa pembaruan mulai diunduh, tetapi prosesnya tidak pernah selesai dan kode Kesalahan 8024A000 ditampilkan. Menurut kode kesalahan, kesalahan ini terjadi ketika Pembaruan Windows mencoba mencegah sesi pembaruan dibatalkan saat sedang melakukan tugas penting. Masalah ini tidak eksklusif untuk versi Windows tertentu karena dilaporkan terjadi pada Windows 10, Windows 8.1 dan Windows 7.

Apa yang menyebabkan Kode Kesalahan Pembaruan Windows 8024A000?
Kami menyelidiki masalah khusus ini dengan melihat berbagai laporan pengguna dan menganalisis beberapa perbaikan paling populer untuk kode kesalahan ini. Ternyata, ada beberapa penyebab potensial berbeda yang mungkin memicu masalah ini:
- Kesalahan Pembaruan Windows - Masalah ini dapat terjadi karena masalah WU berulang. Dalam keadaan tertentu, komponen pembaruan akan macet dan tidak dapat menginstal pembaruan baru yang tertunda. Dalam kasus ini, pemecah masalah Pembaruan Windows harus dapat menyelesaikan masalah secara otomatis setelah menerapkan strategi perbaikan yang berlaku.
- Layanan pembaruan Windows macet dalam keadaan limbo - Ternyata, masalah ini juga dapat terjadi jika satu atau lebih layanan Windows tidak dimulai atau dihentikan. Jika skenario ini berlaku, Anda harus dapat menyelesaikan masalah dengan menggunakan prompt CMD yang ditinggikan untuk menghentikan dan memulai ulang setiap layanan yang terlibat secara paksa.
- DLL terkait WU tidak terdaftar dengan benar - Pembaruan Windows mengandalkan lusinan file Perpustakaan Tautan Dinamis saat mencari & menginstal pembaruan yang tertunda. Dalam kasus ini, Anda harus dapat menyelesaikan masalah dengan mendaftarkan ulang DLL terkait dari jendela Command Prompt yang ditinggikan.
- Kerusakan File Sistem - Kerusakan File Sistem juga dapat bertanggung jawab atas pesan kesalahan khusus ini. Setelah satu file rusak secara efektif dapat merusak seluruh komponen WU. Jika skenario ini dapat diterapkan, Anda harus dapat menyelesaikan masalah dengan menggunakan Pemeriksa File Sistem atau DISM untuk memperbaiki file yang rusak.
- Pengandar RST hilang dari penginstalan Windows - Masalah khusus ini juga dapat terjadi jika komputer Anda kehilangan Pengandar Teknologi Penyimpanan Cepat atau menggunakan versi yang sangat usang. Beberapa pengguna yang terpengaruh dilaporkan berhasil menyelesaikan masalah dengan menginstal versi terbaru driver RST.
- AV pihak ketiga menutup port yang digunakan oleh Pembaruan Windows - Ternyata beberapa alat AV pihak ketiga sangat protektif sehingga cenderung menutup port yang sah yang digunakan oleh Pembaruan Windows. McAfee Total Protection, AVAST, dan Comodo berada di urutan teratas daftar ini, tetapi mungkin ada yang lain. Dalam kasus ini, Anda harus dapat menyelesaikan masalah dengan mencopot pemasangan suite pihak ke-3 dan menggunakan solusi bawaan (Windows Defender).
Jika saat ini Anda berjuang untuk mengatasi pesan kesalahan ini, artikel ini akan mengarahkan Anda ke arah yang benar. Di bawah, Anda akan menemukan beberapa perbaikan potensial yang berhasil digunakan oleh pengguna lain dalam situasi serupa untuk menyelesaikan masalah ini.
Agar tetap seefisien mungkin, kami menyarankan Anda untuk mengikuti metode di bawah ini dalam urutan yang disajikan dan membuang langkah-langkah yang tidak berlaku untuk skenario Anda. Akhirnya, Anda akan menemukan perbaikan yang akan menyelesaikan masalah dalam kasus khusus Anda, terlepas dari penyebab yang menyebabkannya.
Metode 1: Menjalankan pemecah masalah Pembaruan Windows
Jika Anda mengalami masalah ini, Anda harus mulai dengan menjalankan pemecah masalah Pembaruan Windows. Beberapa yang terpengaruh telah berhasil menyelesaikan masalah dengan memaksa pemecah masalah Pembaruan Windows untuk secara otomatis memperbaiki kode Kesalahan 8024A000.
Beberapa pengguna yang terpengaruh telah melaporkan bahwa masalah telah teratasi setelah mereka menjalankan pemecah masalah Pembaruan Windows dan memulai ulang komputer mereka. Ada kemungkinan versi Windows Anda menyertakan strategi perbaikan untuk kesalahan khusus ini. Jika demikian, pemecah masalah akan secara otomatis menerapkan strategi perbaikan dan Anda akan dapat memperbaiki masalah hanya dengan beberapa klik.
Berikut panduan cepat untuk menjalankan pemecah masalah Pembaruan Windows:
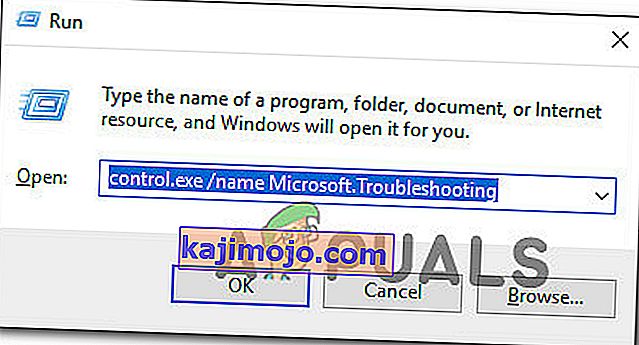
- Tekan tombol Windows + R untuk membuka kotak dialog Run . Kemudian, ketik " control.exe / name Microsoft.Troubleshooting " di dalam kotak teks dan tekan Enter untuk membuka tab Pemecahan Masalah dari aplikasi Pengaturan .
- Setelah Anda berada di dalam tab Troubleshoot, gulir ke bawah ke tab Get up and Running dan klik Windows Update . Kemudian, dari menu yang baru muncul, klik Jalankan pemecah masalah .
- Tunggu hingga pemindaian awal selesai, lalu klik Terapkan perbaikan ini jika strategi perbaikan yang layak ditemukan.
- Jika perbaikan diterapkan, mulai ulang komputer Anda dan lihat apakah masalah telah teratasi setelah urutan pengaktifan berikutnya selesai.

Jika Kode Kesalahan 8024A000 yang sama masih terjadi ketika Anda mencoba menginstal Pembaruan Windows, pindah ke metode berikutnya di bawah ini.
Metode 2: Memulai ulang layanan Pembaruan Windows
Ternyata, masalah khusus ini juga dapat terjadi karena layanan Pembaruan Windows yang macet dalam keadaan limbo (tidak dimulai atau dihentikan). Beberapa pengguna yang terpengaruh telah melaporkan bahwa mereka dapat menyelesaikan masalah dengan memulai ulang setiap layanan yang digunakan oleh komponen WU (Pembaruan Windows).
Prosedur ini telah dipastikan efektif pada setiap versi Windows terbaru (Windows 7.1, Windows 8.1 dan Windows 10)
Berikut panduan singkat tentang cara melakukan ini:
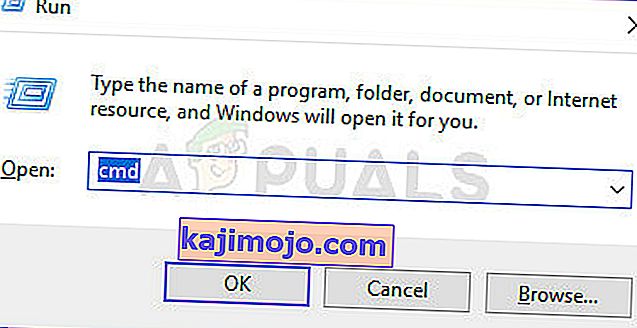
- Tekan tombol Windows + R untuk membuka kotak dialog Run . Di layar berikutnya, ketik "cmd" di dalam kotak teks dan tekan Ctrl + Shift + Enter untuk membuka prompt perintah yang ditinggikan. Saat diminta oleh UAC (Kontrol Akun Pengguna) , klik Ya untuk memberikan hak administratif.
- Setelah Anda berada di dalam prompt CMD yang ditinggikan, ketik perintah berikut secara berurutan dan tekan Enter setelah masing-masing untuk memulai ulang setiap layanan Pembaruan Windows:
net stop wuauserv net stop bits net stop cryptsvc
- Setelah layanan WU dihentikan, ketik perintah berikut dan tekan Enter setelah masing-masing untuk memulai ulang layanan:
mulai bersih wuauserv mulai bersih bit mulai bersih keluar cryptsvc
- Setelah prosedur selesai, mulai ulang komputer Anda dan lihat apakah masalah telah teratasi setelah urutan startup berikutnya selesai.

Jika Kode Kesalahan yang sama 8024A000 masih terjadi ketika Anda mencoba menginstal pembaruan Windows yang tertunda, pindah ke metode berikutnya di bawah ini.
Metode 3: Mendaftarkan ulang DLL yang terkait dengan Pembaruan Windows
Ternyata, mungkin juga alasan Kode Kesalahan 8024A000 konstan adalah file DLL (Dynamic Link Library) yang tidak lagi terdaftar dengan benar. Ini biasanya dilaporkan terjadi pada versi Windows yang lebih lama dan biasanya terjadi karena kerusakan atau setelah pemindai keamanan mengkarantina beberapa item karena infeksi virus.
Jika skenario ini berlaku untuk situasi Anda saat ini, berikut panduan singkat tentang bagaimana Anda dapat mendaftarkan ulang DLL yang berkaitan dengan WU (Pembaruan Windows) untuk memperbaiki Kode Kesalahan 8024A000:
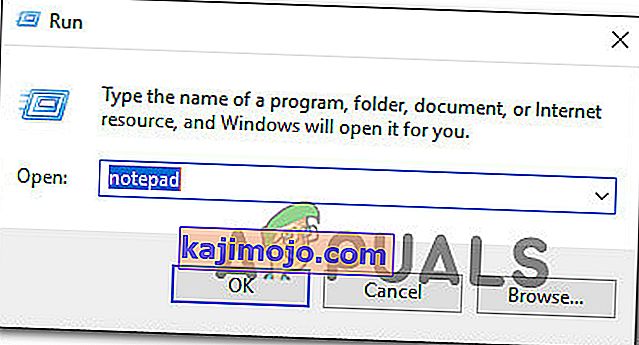
- Tekan tombol Windows + R untuk membuka kotak dialog Run . Kemudian, ketik "notepad" di kotak teks dan tekan Ctrl + Shift + Enter untuk membuka jendela Notepad dengan akses yang ditinggikan. Saat diminta oleh UAC (Kontrol Akun Pengguna)
- Di dalam dokumen Notepad baru, tempel perintah berikut:
regsvr32 c: \ windows \ system32 \ vbscript.dll / s regsvr32 c: \ windows \ system32 \ mshtml.dll / s regsvr32 c: \ windows \ system32 \ msjava.dll / s regsvr32 c: \ windows \ system32 \ jscript.dll / s regsvr32 c: \ windows \ system32 \ msxml.dll / s regsvr32 c: \ windows \ system32 \ actxprxy.dll / s regsvr32 c: \ windows \ system32 \ shdocvw.dll / s regsvr32 wuapi.dll / s regsvr32 wuaueng1. dll / s regsvr32 wuaueng.dll / s regsvr32 wucltui.dll / s regsvr32 wups2.dll / s regsvr32 wups.dll / s regsvr32 wuweb.dll / s regsvr32 Softpub.dll / s regsvr32 Mssip32.dll / s regsvr32 s regsvr32 softpub.dll / s regsvr32 wintrust.dll / s regsvr32 initpki.dll / s regsvr32 dssenh.dll / s regsvr32 rsaenh.dll / s regsvr32 gpkcsp.dll / s regsvr32 sccbase.dll / s regsvr32 cryptdlg.dll / s regsvr32 Urlmon.dll / s regsvr32 Shdocvw.dll / s regsvr32 Msjava.dll / s regsvr32 Actxprxy.dll / s regsvr32 Oleaut32.dll / s regsvr32 Mshtml.dll / s regsvr32 msxml.dll / s regsvr32 msxml2.dll / s regsvr32 msxml3.dll / s regsvr32 Browseui.dll / s regsvr32 shell32.dll / s regsvr32 s regsvr32 wuaueng.dll / s regsvr32 wuaueng1.dll / s regsvr32 wucltui.dll / s regsvr32 wups.dll / s regsvr32 wuweb.dll / s regsvr32 jscript.dll / s regsvr32 atl.dll / sp3 regsvr32
- Setelah Anda menempelkan perintah, buka File (dari menu pita di bagian atas) dan klik Save As .
- Dari jendela Save As, beri nama file apa pun yang Anda inginkan tetapi pastikan untuk mengatur ekstensi Nama File menjadi .bat . Kami menyimpannya WindowsUpdateRegister.bat . Kemudian, pilih lokasi yang dapat diakses dan klik Simpan.
- Klik dua kali pada file BAT yang baru dibuat dan klik Yes pada prompt konfirmasi. Jika Anda juga diminta oleh UAC (Kontrol Akun Pengguna), klik Ya untuk memberikan akses admin.
- Setelah file DLL telah didaftarkan ulang, mulai ulang komputer Anda dan lihat apakah masalah telah diselesaikan setelah urutan startup berikutnya selesai.


Jika masalah 8024A000 masih terjadi, pindah ke metode berikutnya di bawah ini.
Metode 4: Melakukan Pemindaian SFC dan DISM
Masalah khusus ini juga dapat terjadi karena beberapa tingkat kerusakan file sistem. Meskipun masalah ini kurang umum pada Windows 10, masih mungkin untuk mendapatkan kode kesalahan ini karena beberapa file sistem rusak meskipun sistem Anda sudah diperbarui.
Baik DISM (Deployment Image Servicing and Management) dan SFC (System File Checker) adalah utilitas bawaan yang mampu memperbaiki file sistem. Satu-satunya perbedaan adalah mereka melakukannya dengan cara yang berbeda.
While SFC scans and repairs system files by replacing corrupted files with locally stored copies, DISM relies on Windows Update to fix corruption. That’s why it’s important to start this procedure with the SFC scan – if WU has a corruption problem, the System File Checker should resolve it, allowing you to use DISM effectively.
Here’s a quick guide on running an SFC and DISM scan from an elevated Command Prompt:
- Press Windows key + R to open up a Run dialog box. Then, type “cmd” inside the text box and press Ctrl + Shift + Enter to open up an elevated Command Prompt. When you’re prompted by the UAC (User Account Control), click on Yes to grant administrative privileges.
- Once you’re inside the elevated Command Prompt, type the following command and press Enter immediately to start the SFC scan:
sfc /scannow
Note: Keep in mind that once you start this process, there’s no way to stop it without running the risk of producing even more disk errors. Be patient and don’t close the CMD window or attempt to restart your computer.
- When the procedure is complete, you can safely close the elevated command prompt and restart your computer to see if the issue has been resolved at the next system startup.
- If the same issue is still occurring even after you’ve performed the SFC scan, follow step 1 again to open another elevated Command Prompt. Then, type the following command and press Enter to perform a DISM scan:
DISM /Online /Cleanup-Image /RestoreHealth
Note: DISM requires a stable Internet connection in order to be able to download fresh copies of the files that are affected by corruption.
- Once the scan is finished, perform one final restart and check if the issue has been resolved once the next startup sequence is complete.
Method 5: Instaling the Intel Rapid Storage Technology Driver (if applicable)
Another possible culprit that might end up causing the 8024A000 error code is a missing our updated Intel Rapid Storage Technology Driver. Several affected users have reported that the issue was no longer occurring after they installed the latest version of this driver and restarted their computer.
Based on our investigations, this scenario is mostly reported to occur in instances where the user is encountering the issue on Windows 7 or below. If this is applicable, follow the steps below to install the latest driver of Intel Rapid Storage:
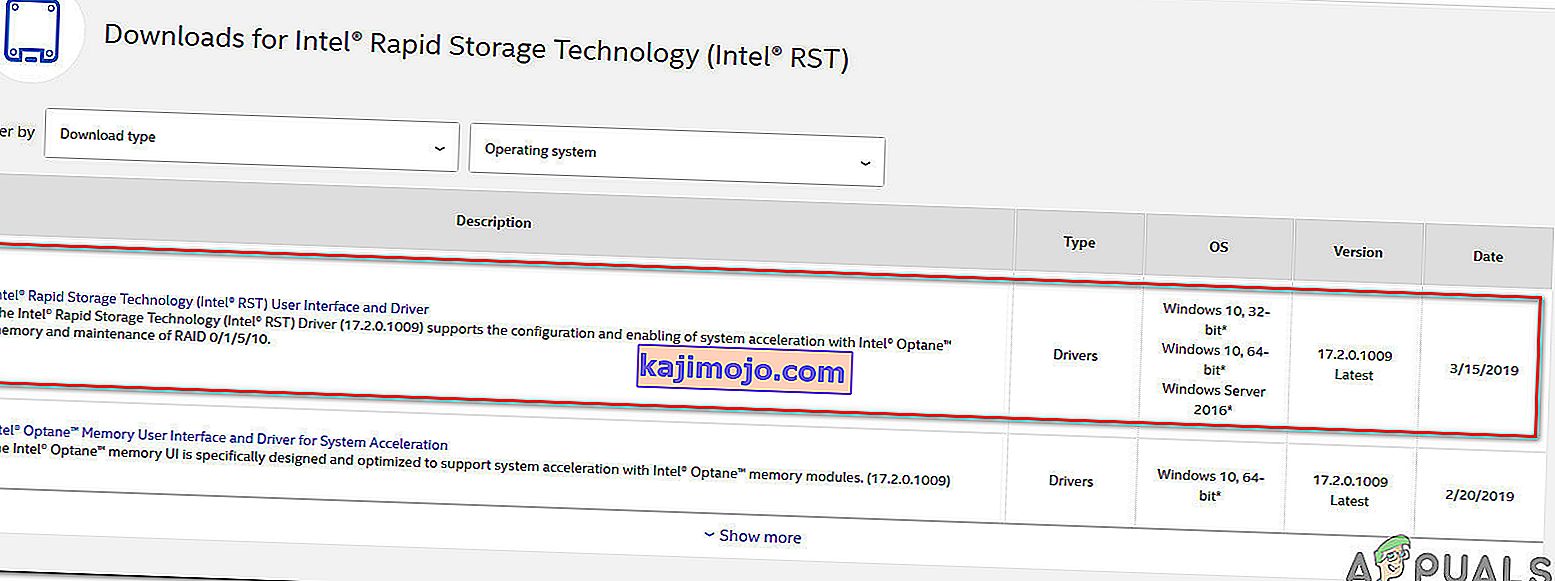
- Visit this link (here) and click on Intel Rapid Storage Technology *RST) User Interface and Driver to initiate the download.
- Once the download is complete, open the installation executable and follow the on-screen prompts to complete the installation of the latest RST driver.
- Restart your computer once the driver is installed and see if the issue has been resolved once the next startup sequence is complete.

If you’re still encountering the 8024A000 Error Code, move down to the next method below.
Method 6: Uninstalling 3rd party AV
As it turns out, it’s also possible that the issue is actually being caused by an overprotective 3rd party AV suite. Several affected users have reported that the issue was resolved after they uninstalled the 3rd party security scanner and reverted back to the default AV (Windows Defender).
McAfee Total Protection, AVAST, and Comodo are commonly reported as being responsible for causing the 8024a000. Users are speculating that the issue occurs because the AV ends up blocking some ports that are actually being used by the WU component.
UPDATE: Based on several user reports, this issue can also be caused by the premium version of Malwarebytes. If you’re using a premium subscription for Malwarebytes, you should be able to resolve the issue by disabling Ransomware protection from the Settings menu.
If you’re suspecting that your third-party AV/firewall is causing the issue, follow the steps on this article (here) to completely uninstall your AV suite without leaving any remnant files.
If this scenario is not applicable or the issue is still occurring even after you’ve uninstalled your 3rd party AV suite, move down to the next method below.
Method 7: Performing a repair install
If none of the methods above have helped you to resolve the issue, a repair install should end up repairing the Windows Update problems. This procedure will reset all Windows components, including booting-related processes.
However, it does things a bit more efficiently than a classic clean install in the sense that it allows you to keep all personal data including photos, videos, applications, and games). The only thing that will get deleted and replace are all Windows components – which is exactly what you need.
In case you want to go for a repair install, you can follow the instructions on this article (here) for step by step instructions on how to do this efficiently.